Is It Bad for the Refrigerator? A Home Troubleshooting Guide
Discover how to tell if something is bad for your refrigerator, identify common causes, and learn practical steps homeowners can take to fix issues and preserve efficiency.

Is it bad for the refrigerator? A quick check points to core culprits: keep the interior at 37°F (3°C), ensure door seals are airtight, avoid overpacking, and clean condenser coils regularly. Verify airflow around the back and sides, plus a stable, uninterrupted power supply. When these are off, efficiency drops and parts wear faster.
What 'is it bad for the refrigerator' really means
When homeowners ask whether it is bad for the refrigerator, they’re usually trying to separate symptoms from root causes. Temperature drift, noisy operation, frost buildup, or frequent cycling can all indicate strain on the system. Understanding how your fridge works helps you respond quickly and avoid unnecessary repairs. According to How To Refrigerator, keeping the fridge within recommended temperatures and ensuring proper airflow are the most cost-effective levers for reliability. Small habits—like avoiding overfilling shelves and cleaning coils—can yield big returns in energy savings and food safety. In this context, the question is less about a single defect and more about overall operating efficiency: is it bad for the refrigerator because a single issue can cascade into bigger problems? The goal is to identify early warning signs and act before ordinary wear becomes expensive damage.
Core factors that affect fridge health
Several interrelated systems determine how hard your refrigerator works and how long it will last. Temperature stability affects ice formation, food safety, compressor load, and energy use. Door seals determine cooling loss; even a tiny gap lets warm air in and cool air out. Condenser coils pull heat away from the interior; dirty coils force the compressor to work longer. Proper airflow around the unit ensures even cooling and reduces frost buildup. Location matters too: a spot with good ventilation, away from heat sources, minimizes strain. How To Refrigerator analysis shows that many households overlook door seals and coil cleanliness, which leads to avoidable wear on compressors and fans. Regular attention to these basics can dramatically improve efficiency and longevity, reinforcing the idea that is it bad for the refrigerator when you ignore these fundamentals. By maintaining consistent temps, sealing drafts, and cleaning coils, you support a healthier, quieter, more efficient appliance.
Signs your fridge is harming its own performance
Look for telltale indicators that something is off before a minor hiccup becomes a costly repair. Uneven cooling or interior frost means the thermostat or defrost system could be malfunctioning. A damp or loose door seal allows warm air to creep in, raising energy use and shortening the appliance’s lifespan. Odd noises, such as buzzing or rattling, often point to a failing compressor, fan, or motor. Water pooling around the base can indicate a clogged defrost drain or a misaligned drainage path. If you notice temperature fluctuations, frequent cycling, or unusual odors, investigate promptly. The How To Refrigerator team recommends a quick baseline check—confirm target temperatures, inspect seals, and listen for abnormal noises—and then proceed with targeted fixes as needed. These signals are not random; they map to the fridge’s cooling loop and electrical controls, and catching them early saves money and stress.
Home checks you can perform this weekend
You don’t need fancy tools to start diagnosing issues. Begin with the basics: verify interior temperature with a thermometer placed away from the door; test door seals by closing a dollar bill (or a card) at the gasket to see if it resists easily. Check condenser coils at the back or beneath the unit and wipe away dust with a damp cloth or vacuum. Ensure there’s at least a few inches of clearance around the sides and back for airflow. If your fridge is not cooling evenly, rearrange shelves to avoid blocking vents. Listen for unusual noises when the compressor runs, and observe any frost patterns on the evaporator coil. Following these checks often reveals whether the problem is a simple adjustment or a sign of a deeper fault. Remember: patience and methodical steps beat guesswork, as covered in our step-by-step maintenance plan. How To Refrigerator advocates approaching diagnostics with a calm, methodical mindset.
Maintenance routines to prevent damage and improve efficiency
Prevention is cheaper than repair. Clean condenser coils every 6–12 months (more often in dusty environments). Replace door gaskets if you notice gaps or stickiness, and ensure the fridge sits level with proper feet contact. Keep the interior clean and organized to avoid obstructing airflow; avoid overpacking, especially near vents. Check the door half-open sensor if present, and ensure the light turns off when closed to confirm the latch seals properly. Regularly inspect the power cord for signs of wear and use a surge protector to guard against power fluctuations. The goal is a steady operating baseline that minimizes strain on the compressor, fan, and defrost system. With consistent care, you’ll extend the life of your refrigerator, reduce energy bills, and keep food safe. The How To Refrigerator team emphasizes that small, routine actions have outsized benefits for overall appliance health.
When to call a professional for fridge issues
While many fixes are DIY, some problems require licensing or specialized equipment. If you suspect a refrigerant leak, electrical fault, noisy compressor, or persistent cooling failure after basic checks, contact a qualified technician. Do not attempt to repair refrigerant lines or internal wiring yourself; these tasks require proper tools and safety protocols. If your fridge is under warranty, consult the manufacturer’s service center to avoid invalidating coverage. In cases of persistent frost buildup, water leakage, or abnormal cooling patterns that don’t resolve after cleaning coils and seals, professional diagnosis is the prudent path. The How To Refrigerator guidance is clear: start with safe, easy steps, then escalate when you detect signs that exceed routine maintenance.
Long-term care for longevity and energy savings
Adopting a proactive maintenance routine pays off in reliability and cost savings. Keep a simple calendar for monthly checks (door seals, door alignment, seals, and gasket lubrication if recommended). Clean coils at least every year, check the thermostat accuracy, and monitor energy use—unusual spikes often signal an underlying issue. Consider relocating the fridge away from heat sources such as ovens or sunny windows, and ensure it has proper ventilation. Investing in a slightly higher-efficiency model can also be worth it over time if the current unit is near the end of its life. By integrating these habits, you reduce the likelihood of significant failures and protect the investment in your kitchen. The How To Refrigerator team’s verdict is that disciplined, practical maintenance delivers the best long-term results for household refrigerators.
Tools & Materials
- Fridge thermometer(Place in the center of the fridge for accurate temperature reading)
- Soft microfiber cloth(For dusting coils and cleaning gaskets)
- Vacuum with brush attachment(Use to remove dust from condenser coils)
- Mild dish soap(Gentle cleaner for gaskets and interior surfaces)
- Gasket tester or a folded dollar bill(Test door seal tightness)
- Phillips-head screwdriver(Only if you need to access back panel screws)
- Gloves(Protect hands during coil cleaning)
- Owner’s manual or model guide(Reference specific installation and repair guidance)
Steps
Estimated time: 30-60 minutes
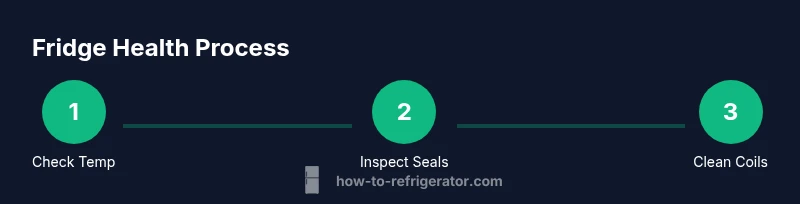
- 1
Check interior temperature
Place a fridge thermometer in the center shelf and read after 24 hours. Confirm the temperature is near 37°F (3°C). If it’s higher, adjust the thermostat setting by 1–2 increments and recheck. Ensure the door seals are not allowing drafts during test.
Tip: If temperature stays high, measure airflow around the fridge and ensure it isn’t blocked by nearby items. - 2
Inspect door seals and gaskets
Close the door on a dollar bill or a thin card. If you can pull it out easily with light resistance, the gasket may be worn or dirty. Clean with mild soap and water; if gaps persist, consider replacement.
Tip: A simple seal test now can prevent energy waste later. - 3
Clean condenser coils
Unplug the fridge, access the coils at the back or underneath, and remove dust with a vacuum and brush. Reconnect power and monitor for improved cooling and reduced noise.
Tip: Avoid metal scrapers that could damage fins; use a soft brush instead. - 4
Check airflow and placement
Ensure there’s 2–3 inches of space behind and around the unit for air to circulate. Remove items that block vents on interior shelves to promote even cooling.
Tip: If the fridge sits on a carpet, place a hard surface underneath to improve ventilation. - 5
Listen for abnormal noises
Run the compressor and listen for buzzing, rattling, or loud cycling. If noises persist after the above steps, it may indicate a component wear that requires professional evaluation.
Tip: Document the noise pattern and duration to share with a technician if needed.
FAQ
What temperature should my refrigerator be?
Aim for 37°F (3°C) for the main compartment and slightly higher for the freezer. Use a thermometer to confirm and adjust as needed.
Aim for about 37 degrees Fahrenheit, with a thermometer to verify. Adjust the setting if you notice temperature drift.
Why is my fridge not cooling evenly?
Uneven cooling can result from blocked vents, dirty coils, or a thermostat issue. Start with coil cleaning and checking airflow.
If cooling is uneven, check for blocked vents and clean the coils first, then verify the thermostat.
Can I fix a refrigerant leak myself?
No. Refrigerant leaks require licensed technicians and specialized tools. Do not attempt a DIY repair.
Refrigerant leaks must be handled by a licensed tech; don’t try to fix them yourself.
How often should I clean the condenser coils?
Clean coils at least once a year; dusty environments may require more frequent cleaning.
Clean the coils at least once a year, more often if your home is dusty.
What are signs I should call a pro?
Persistent frost buildup, water leaks, strange noises, or continued cooling problems after basic checks indicate a pro is needed.
If problems persist after checks, or you hear odd noises, call a professional.
Is it bad for the refrigerator to overfill it?
Overloading reduces airflow and can cause cooling imbalances. Leave space for air to circulate.
Overfilling blocks airflow and can hurt cooling; leave space for air to move.
Top Takeaways
- Maintain a consistent 37°F (3°C) inside the fridge.
- Seal integrity and coil cleanliness are the top energy-savers.
- Regular checks prevent major faults and extend life.
- Call a pro for refrigerant leaks or electrical faults.
- Practice a simple, repeatable maintenance routine.