Insignia Mini Fridge Repair and Maintenance Guide
Learn to diagnose and repair common issues with the insignia mini fridge. This step-by-step guide covers cooling problems, door seals, condenser coils, and defrost drains with safety tips.

Goal: Diagnose and safely repair common issues with the insignia mini fridge. By following this quick guide you’ll confirm power, inspect door seals, clean condenser coils, check the thermostat, and fix defrost paths. You’ll also learn which symptoms warrant professional service and which fixes you can safely perform at home.
Insignia mini fridge: at a glance
The insignia mini fridge sits neatly in tight spaces, making it a popular choice for apartments, dorm rooms, studios, and office break rooms. Despite its compact footprint, it performs the essential job of preserving perishables, beverages, and medicines. Understanding its layout helps before you troubleshoot. Most insignia models place the condenser coils on the back or bottom and offer adjustable shelves, a dash-style thermostat, a reversible door, and door bins. For homeowners, this means a quick demo: ensure clearance around the unit for air flow, keep the interior clean, and monitor door seals for leaks. The design emphasizes efficiency, with temperature control that should keep interior temperatures stable without overworking the compressor. From a homeowner's perspective, the most common issues are temperature fluctuations, frost buildup, a non-sealing door, unusual noises, or water leaks. By knowing where key components live and how they interact, you can approach problems methodically rather than randomly poking at components. This section also highlights routine maintenance steps you can perform safely and independently, reducing unnecessary service calls and prolonging the appliance’s life. According to How To Refrigerator, building a small routine around cleaning the seals and coils yields the best balance between performance and longevity.
Diagnosing common symptoms in insignia mini fridges
When the interior fails to cool properly, or the temperature climbs unpredictably, start with the simplest explanations. Check that the unit is plugged in and that the outlet is working. Inspect the door gasket for gaps or tears; even a small crack can let cold air escape and raise freezer and fridge temperatures. Listen for unusual noises from the compressor or fans; grinding or humming that changes with the thermostat suggests a mechanical issue. Frost buildup on the back wall or behind the freezer can indicate a defrost drain clog or an overworked compressor. Water pooling inside or outside the unit may point to a blocked defrost drain or a damaged line. Finally, observe condensation on the interior walls; this can come from high ambient humidity, door left ajar, or a failed seal. Use a thermometer to verify that interior zones stay near typical range (without giving exact numbers). Throughout diagnosis, record symptoms and timings to see if the issue is intermittent or persistent, which helps determine whether you can fix it yourself or need professional service. Based on How To Refrigerator research, a systematic check of seals, coils, and defrost paths often resolves many common problems.
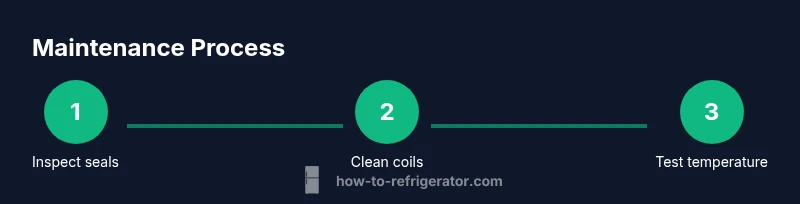
Preventive maintenance and cleaning for longevity
Preventive care keeps insignia mini fridges reliable across seasons. Start with a light interior wipe-down using a mild soap solution and a soft cloth to remove spills and residue. Dry thoroughly to prevent moisture from affecting components. If accessible, gently vacuum or brush condenser coils to improve airflow; cleaned coils reduce energy use and heat buildup. Inspect the door seals monthly: look for cracks, stiffness, or compression that allows air leakage. If you notice a torn gasket, plan for a replacement that matches the model's size and mounting style. Keep the unit on a level surface to prevent door misalignment; proper leveling also protects the door seal. Finally, let the interior air out after cleaning to minimize lingering odors. By keeping the interior clean and the seals healthy, you minimize frost formation and maintain consistent cooling. How To Refrigerator's approach emphasizes simple, non-destructive routines that homeowners can perform without special tools.
When to DIY vs. call a pro
Some fixes are safe for a confident DIY approach, while others require professional intervention. If the problem relates to door seals, interior cleanliness, coil accessibility, or thermostat settings, you can often address it with basic tools and careful testing. Avoid opening sealed refrigerant lines or removing panels that require specialized torque or refrigerant handling—the risks include leaks, skin irritation, and fire hazards. If power is present but there is no cooling, or if you hear continuous loud noises, or if water leaks persist after basic checks, it’s time to seek professional service. Document symptoms, model, and when you first noticed the issue to share with a technician. If your insignia mini fridge is under warranty, contact the manufacturer or authorized service centers to preserve coverage. In the long run, weighing DIY capability against repair costs helps decide whether to fix or replace. The How To Refrigerator team recommends consulting a pro for refrigerant or compressor problems and when the unit is beyond economical repair.
Authority sources and references
For energy efficiency and appliance guidelines, consult reputable sources including government and major publications. Visit https://www.energy.gov/energysaver/appliances for official guidance on energy-efficient appliances, https://www.energystar.gov/products/fridges for performance standards, and https://www.nist.gov/topics/refrigeration for broader refrigeration science. These sources provide baseline considerations for safe operation, efficiency, and safe handling when troubleshooting at home.
Extending the life of your insignia mini fridge
Long-term care pays off with fewer repairs and better efficiency. Position the fridge away from heat sources, direct sunlight, and moisture. Keep the interior organized to avoid blocking air vents and distribute items to maintain airflow. Schedule seasonal checks for door seals, drain paths, and coil cleanliness. Consider a professional inspection every few years to verify refrigerant health and compressor integrity. Finally, use the appliance in line with the manufacturer's guidelines, avoid overloading shelves, and ensure proper door closure. Following these practices helps maximize performance and life expectancy of the insignia mini fridge.
Tools & Materials
- Multimeter(for testing electrical components)
- Screwdriver set (flathead and Phillips)(for accessing panels)
- Soft cloths(for interior wipe-downs)
- Mild dish soap(gentle cleaning solution)
- Vacuum or small brush(coil cleaning if accessible)
- Gloves(protect hands when handling panels)
- Replacement door gasket (matching model)(if leaks are detected)
- Thermometer or fridge thermometer(verify interior temps)
- Ratchet or torque driver (if panel screws are snug)(avoid over-tightening)
Steps
Estimated time: 30-60 minutes
- 1
Unplug and ensure safety
Unplug the insignia mini fridge from the wall outlet and remove any power strip connection. Wait 5 minutes to allow capacitors to discharge before touching any metal parts. If the unit is in a damp area, wear dry gloves and keep the area dry during inspection.
Tip: Always start with safety first; never service when the appliance is powered. - 2
Empty and inspect door seals
Open the door and remove contents to inspect the door gasket for cracks, hardening, or gaps. Check for light visible around the seal when doors are closed; a visible gap means air leakage. If you find damage, plan for a compatible gasket replacement.
Tip: A bright flashlight helps reveal hairline cracks you might miss with normal lighting. - 3
Clean condenser coils
Locate condenser coils (usually at the rear or bottom). Gently vacuum or brush away dust and lint to improve airflow. Do not bend or damage fins; if accessibility is too tight, skip this step and consult a professional.
Tip: Clean coils during cool periods to avoid overheating during cleaning. - 4
Test the thermostat
Access the thermostat or temperature control and verify it responds to setpoint changes. If the reading does not follow the dial, test with a fridge thermometer to confirm actual temperature alignment. Adjust settings gradually and observe for stabilization.
Tip: Use a dedicated fridge thermometer for accurate readings. - 5
Check the defrost drain
Locate the defrost drain and ensure it is clear of blockages. Use a flexible wire or pipe cleaner to remove ice or debris that could block drainage. Run the unit briefly and watch for water clearing through the drain if accessible.
Tip: Avoid using harsh chemicals in the defrost drain; it’s a sensitive pathway. - 6
Assess noises and leaks
Listen for unusual noises that change with the thermostat or during cycling. Inspect for any visible refrigerant odors or dampness around connections. If noises persist after cleaning and checks, prepare for professional service.
Tip: A steady hum is normal; grinding or rattling indicates a potential mechanical issue.
FAQ
What are common signs my insignia mini fridge needs service?
Common signs include warm interior, frost buildup not resolved by defrost, unusual noises, and water leaks. Begin with power checks, seal inspection, and coil cleaning, then test the thermostat. If issues persist, seek professional help.
Common signs are warmth, frost that won't clear, unusual noises, or leaks. Start with power, seals, and coils, then test the thermostat.
Is it safe to DIY repair an insignia mini fridge?
Safe DIY fixes include door seal replacement, coil cleaning, and thermostat verification. Avoid repairing refrigerant lines or compressors yourself due to safety and legal risks. When in doubt, consult a professional.
DIY fixes like seals, coils, and thermostat checks are usually okay. Don’t touch refrigerant lines or compressors yourself.
How can I tell if door seals need replacement?
If you feel air leakage with the door closed, observe condensation patterns, or notice frost forming near the door, the gasket likely needs replacement. Match the gasket to your model and install according to the manufacturer’s instructions.
Air leakage or frost near the door usually means a bad gasket that should be replaced.
Why is there frost buildup inside the fridge?
Frost can form from defrost drain blockages, high humidity, or a failing seal allowing moist air inside. Clear obstructions, verify drainage, and ensure the door seals seal properly. If frost reappears after these steps, professional service may be needed.
Frost usually means drainage or sealing issues; clear the drain and check the seals first.
When should I replace the insignia mini fridge instead of repairing?
Consider replacement when the repair costs approach or exceed a substantial portion of a new unit, or when the compressor or refrigerant system shows persistent failures. Warranty status and energy efficiency should also factor into the decision.
If repairs keep costing more than a new unit or the compressor is failing, replacement is smarter.
Where can I find official guidance on appliances like this?
Refer to government and major publications for appliance guidance. Start with energy.gov’s appliance tips and energystar’s fridge standards for reliable benchmarks and safety guidelines.
Check energy.gov and energystar for official appliance guidance and benchmarks.
Watch Video
Top Takeaways
- Unplug before inspection and start with door seals.
- Regular coil cleaning boosts efficiency and cooling.
- Test thermostat comprehensively to verify cooling setpoints.
- Defrost drain blocks cause frost and leaks—clear them safely.
- Call a professional for refrigerant or compressor concerns.