How to Remove Glass Shelf from Refrigerator: A Step-by-Step Guide
Learn how to remove glass shelf from refrigerator safely with a complete, homeowner-friendly guide. Tools, step-by-step instructions, safety tips, and reinstallation best practices from How To Refrigerator.

This guide shows how to remove glass shelf from refrigerator safely: unplug the unit, empty the contents, and support the shelf with both hands. Slide the shelf toward you, lift evenly to clear the front brackets, and place it on a padded surface. Inspect for chips, wipe clean, and reinsert once dry.
Why this task matters for homeowners
For homeowners, knowing how to remove glass shelf from refrigerator safely is a practical skill that protects delicate glass and preserves the appliance’s interior. Glass shelves are designed to hold items securely, but their tempering makes them vulnerable to cracking if you apply uneven pressure or try to force a stuck bracket. Taking a careful, methodical approach reduces the risk of injury and damage, and it makes routine maintenance like cleaning and rearranging shelves much easier. How you remove the shelf also informs reinstallation, ensuring the shelf sits flat and supports weight evenly. A well-executed removal reduces the chances of leaks or temperature fluctuations caused by misaligned components. Throughout this guide, you’ll see How To Refrigerator’s practical, homeowner-centered approach to repair and maintenance.
Shelf variants and how they affect removal
Most refrigerators use tempered glass shelves that rest on front-support brackets and back rails. Some shelves are adjustable, while others are fixed in place with clips or small hooks. The removal method depends on the model: adjustable shelves may slide out after releasing a front clip, whereas fixed shelves require decoupling from rear supports. Before you start, note the shelf’s orientation so you can reinstall it correctly. If your fridge has a crisper drawer above or a large door bin nearby, plan your move to avoid bumping other components.
Safety and preparation: laying the groundwork
Safety first. Disconnect power to the fridge to avoid any risk of shock, and ensure the area around the fridge is clear. Empty the shelf so there’s nothing heavy that could fall during removal. Wear non-slip gloves to protect your hands from sharp edges and use a soft, padded surface (like a folded towel or foam mat) under the shelf. Keep a damp cloth handy to wipe away condensation, and have a small, bright flashlight if you’re peering into dim corners. How you prepare sets the stage for a smooth removal and protects fragile glass.
Step-by-step approach at a high level
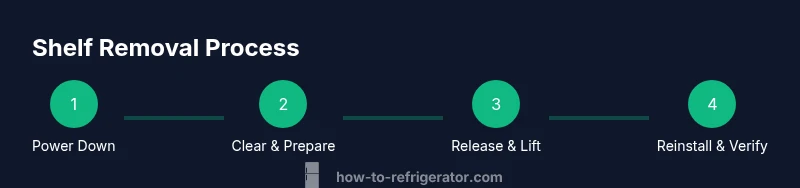
While this section summarizes the approach, you’ll find a detailed, step-by-step sequence later in the article. In short, identify how the shelf is secured, create a stable working area, release any front-edge clips or brackets, and lift the shelf out evenly while supporting it with both hands. Understanding this flow helps you anticipate when to stop and re-check the alignment.
What to do if the shelf feels stuck or resists movement
Stubborn shelves often resist removal because of misaligned guides or partially engaged brackets. Do not force the shelf—this can crack glass and damage supports. Check the front edge for clips, then inspect the rear rails for any signs of resistance. If you hear clicking but can’t pull the shelf out, try slightly lifting the front edge while easing the back edge away from the rail. Patience saves glass and keeps components intact.
Cleaning, drying, and inspection after removal
Once the shelf is out, wipe off any spills or residues with a microfiber cloth. Dry thoroughly to prevent moisture from seeping into plastic supports or the rails. Inspect for chips or cracks along the edges; even small blemishes can worsen with use. If the glass shows any significant damage, replace the shelf rather than attempting a risky reinstallation. This inspection step helps ensure the shelf is safe and ready for reuse.
Reinstallation: orientation, fit, and alignment
Place the shelf back with its correct orientation—front edges usually face the door and may have notch indicators. Align the shelf with the rear rails or supports, then ease it into place without forcing it. Gently press down to ensure the shelf seats evenly on both sides and verify that it rests flush against the door gasket. A level, properly seated shelf improves weight distribution and reduces the chance of future jams.
Final checks and ongoing maintenance
After reinstalling, replug the fridge and give it a few minutes to stabilize temperature. Wipe down surrounding shelves to keep the interior clean, and periodically inspect the edges for chips or cracks. If you have kids or pets, consider reinforcing safety by ensuring shelves are intact and securely seated before restocking. Regular checks help prevent unexpected failures and extend the life of the glass components.
Tools & Materials
- Non-slip gloves(Protect hands from sharp edges; choose gloves with good grip)
- Soft, padded surface(Folded towel or foam mat to cushion the shelf when set down)
- Microfiber cloth(For wiping condensation and cleaning the glass surface)
- Bright flashlight(Helps illuminate dim corners behind shelves)
Steps
Estimated time: 10-15 minutes
- 1
Power down and prepare the area
Unplug the refrigerator and empty the shelf area to reduce risk of shocks and spills. Clear surrounding items and ensure you have a stable workspace. This upfront preparation minimizes movement and keeps glass safe.
Tip: Keep the cord away from the shelf path to avoid tangling during removal. - 2
Stabilize the shelf and brace edges
Stand to the front of the shelf and place a padded surface directly beneath it. Use both hands to cradle the glass edges so you can guide it smoothly without twisting.
Tip: Spread your fingers along the long edges to distribute pressure evenly. - 3
Release front-edge clips or brackets
If your shelf uses clips, gently disengage them from the front supports. If it sits on hooks or rails, identify the correct disengagement point and release with a controlled, light lift.
Tip: Work slowly and keep your grip; sudden release can cause the shelf to tilt unexpectedly. - 4
Slide and lift the shelf clear
Slide the shelf toward you while maintaining even upward pressure to clear rear supports. Lift the front edge slightly to clear hooks, then lower it gently onto the padded surface.
Tip: Never twist the shelf while lifting; straight-up motion reduces risk of cracks. - 5
Inspect for damage and clean
Examine edges for chips or cracks. Wipe both sides with a microfiber cloth and dry thoroughly before any reinstallation.
Tip: If you see cracks, set the shelf aside and consult replacement options. - 6
Prepare for reinstallation
Confirm the shelf orientation and the alignment of rear supports. If necessary, inspect brackets for wear and cleans any dust from contact points.
Tip: Note any orientation marks so you reinstall correctly the first time. - 7
Reinstall with care
Place the shelf back onto the supports, align evenly, and firmly press until it sits flush. Replace any front-edge clips and confirm the shelf rests securely.
Tip: Test by gently pressing on the shelf with light weight to ensure stability.
FAQ
Can I remove a glass shelf while the fridge is plugged in?
No. Always unplug the refrigerator and empty the area before removing a glass shelf to avoid electric shock or accidents.
Never remove a shelf while the fridge is plugged in; unplug first.
What should I do if the shelf is stuck?
Stop and inspect for hidden clips or misaligned rails. Do not force—try lifting slightly and rechecking engagement points.
If it’s stuck, don’t force it. Check clips or rails and try again gently.
How can I tell which side goes up when reinstalling?
Look for notches, labeling, or a front-facing edge that aligns with the door. Reinstall with the same orientation as before.
Check any notches or labels to reinstall the shelf the right way up.
Is it safe to lift a heavy glass shelf by one edge?
No. Always cradle the shelf with both hands along the edges to prevent cracking and achieve even weight distribution.
Avoid lifting by a single edge; use two hands to support it.
How should I clean the shelf before reinstalling?
Wipe with a microfiber cloth and mild soap, then dry completely before putting it back. Moisture can affect plastic supports and rails.
Clean and dry the shelf before reinstalling.
What if the glass shelf is cracked?
Do not reuse a cracked shelf. Replace it and inspect surrounding supports for any damage.
If cracked, replace the shelf and check the area for damage.
Watch Video
Top Takeaways
- Unplug and clear the area before removing.
- Support glass edges with both hands at all times.
- Check for damage and clean thoroughly before reinstallation.
- Align orientation and seats firmly to ensure stability.
- Take your time to avoid cracking or misalignment.