How to Put Refrigerator Shelves Back In: A Homeowner’s Guide
Learn a safe, clear method for reinstalling refrigerator shelves. This step-by-step guide covers inspecting pegs, aligning guides, and securing shelves, with pro tips from How To Refrigerator.

In this guide, you’ll learn how to put refrigerator shelves back in quickly and safely. Start by clearing the area, cleaning the interior, and inspecting shelf pegs or supports for damage. Then align the shelf guides, slide each shelf into place, and adjust the height to fit items. Follow the step-by-step process for best results.
Safety and prep before you start
Before you touch any shelves, make safety a priority. If you’re curious about how to put refrigerator shelves back in, your first steps are to power down the area and clear a workspace. Unplug the unit or switch off the circuit if you’ll be handling heavy shelves near the door. Wear non-slip gloves and wipe the interior with a microfiber cloth to remove spills and dust. According to How To Refrigerator, safety and cleanliness are foundational to any appliance repair task. A clean, dry surface helps you see peg holes clearly and reduces the chance of misalignment. Create a dedicated area nearby to place shelves as you remove or reinsert them, and keep a small towel handy for moisture. If you encounter bent rails or cracked pegs, don’t force the shelf—set it aside and replace the damaged parts first. This prep minimizes the risk of scratches and accidental drops and makes the actual reinstall smoother.
In many refrigerators, you’ll find adjustable shelves that slide along rails or rests on pegs. Being clear about the layout before you begin reduces frustration and expedites the process. How To Refrigerator emphasizes documenting your current setup if you’re unsure about the orientation, and paying attention to any labeling on the rails that indicates shelf position. A quick visual check now saves time later and helps ensure you reinstall the shelves correctly the first time.
Understanding shelf types and positions
Refrigerator shelves come in several configurations, including glass, wire, and lightweight cantilever designs. Some models use a peg-based system with notches along a vertical rail, while others rely on sliding rails or adjustable supports. Knowing your shelf type helps you choose the right insertion method and avoids forcing a shelf into a misaligned notch. For example, glass shelves are delicate and require gentle handling, while wire shelves are more forgiving but can bend if lifted unevenly. When you’re learning how to put refrigerator shelves back in, observe how each shelf rests in its tracks and whether there are safety tabs or retainer clips to engage. If your shelves have a unique notch pattern, take a photo before removal so you can mirror the original orientation precisely. Keeping notes on the shelf type during reinstallation is a small step that pays off if you need to service your fridge again in the future. As you plan, consider the space’s layout and the height needed for taller containers, aligning each shelf with the corresponding rail or peg position.
A well-balanced approach helps ensure stability and prevents shelf sag. The How To Refrigerator team notes that understanding the differences between fixed-position shelves and adjustable shelves is essential for a smooth reinstall. If your model has a tilt-forward lip, ensure the lip faces inward toward the fridge to lock the shelf in place. Visual cues like small ridges or notches should align with corresponding pegs. This awareness reduces trial-and-error and speeds up the process.
The shelf configuration can also influence how you arrange frequently used items. Place everyday items at the front and top shelves for easy access and adjust the height to accommodate tall bottles or jars. A properly configured interior can also improve airflow and energy efficiency over time. When you finish, you’ll have a well-organized interior that makes daily tasks quicker and more enjoyable.
Tools and prep you’ll need
Before you start, gather a few simple tools and supplies to make the process smoother. This preparation helps you avoid scrambling mid-reinstallation and reduces the risk of damage to shelves or interior walls. The following list covers essentials and helpful extras:
- Gloves (essential for grip and protection) • Note: non-slip, machine-washable
- Soft microfiber cloth (essential for cleaning and dust removal)
- Mild dish soap or gentle cleaner (essential for removing residues)
- Bucket or damp cloth for interior wipe-down (optional but helpful)
- Replacement pegs or rails (optional, if you notice wear)
- Small flashlight or phone light (helps you see peg holes clearly)
- Camera or phone to photograph the original orientation (optional but very helpful)
- Flat-head screwdriver (optional, only if your rails are screw-fastened)
If you’re unsure about any part, start with the essentials and add more tools as needed. The goal is a clean, accessible work area where you can inspect pegs, rails, and shelf edges without obstruction. For safety, keep kids and pets away during the reinstall and avoid leaning on the fridge door while you work. A calm, methodical approach makes the reinstallation smoother and reduces the risk of accidentally dropping a shelf or bending a rail.
How To Refrigerator’s guidance emphasizes using a soft cloth and warm soapy water to wipe down shelves before reinstalling. This practice not only makes the shelves slide more easily but also helps you spot any cracks or chips that could lead to future breakage. If you notice damaged pegs or rails, replace them before continuing. Small replacements can prevent larger issues down the line and extend the life of your fridge.
Step-by-step reinstall: part 1 - remove items and inspect pegs
Begin by removing all items from the shelf you’re working with and placing them on a nearby stable surface. Take a moment to examine each peg, rail, and corner for cracks, bending, or wear. If you see damage, discontinue and replace the affected components before continuing. The goal is to avoid forcing a shelf into a damaged track, which could cause cracks or misalignment. After removing the shelf, wipe down the area with a clean cloth to clear dust and spills, then inspect the peg holes for debris. Any obstruction can prevent a proper fit. A quick check also helps you determine the correct orientation. If you’re unsure, take a quick photo of the original setup. This step reduces the risk of reinstalling the shelf backward or in the wrong notch.
Tip: If your pegs are removable, gently lift them to inspect the holes beneath for obstruction. If you find a hardened residue, use a damp cloth to wipe it away. Remember to dry the area before proceeding. As you work, keep the shelf you’re reinstalling within reach but away from the door to prevent accidental tilting or dropping. The goal of this step is to prepare a clean, clear space for safe reinstallation and ensure you won’t encounter surprises once you begin sliding shelves back in.
Step-by-step reinstall: part 2 - align guides and position shelf ridges
With a clean interior, position the first shelf so its back edge rests on the furthest track supported by pegs or rails. Align any ridges, lips, or notch patterns with the corresponding guides. If you’re working with adjustable shelves, note the correct notch for the height you want. Carefully slide the shelf in from the back toward the front until the back edge sits on the rail. Do not force the shelf if it binds; instead, stop, check alignment, and adjust.
Pay attention to any retainer clips or stops that must engage before the shelf will sit flush. If your shelf is glass, support both sides evenly to prevent tipping. Some models require you to tilt slightly to catch the front lip; in such cases, angle gently and avoid twisting the shelf. A precise alignment minimizes the risk of warping and ensures the shelf will bear weight evenly. You can use a flashlight to inspect whether pegs fully seat in the holes and whether the shelf sits flat along the rail.
When you’re satisfied with alignment, move to the next shelf, repeating the same checks. Keep a small ruler or a measuring tape handy if you need to ensure uniform shelf heights across multiple levels. Consistency helps with stacking containers and maintaining even airflow for cooling.
Step-by-step reinstall: part 3 - lock in and level
Finally, secure each shelf by ensuring the pegs or rails are fully seated and that the shelf lies flat against the back wall. If your model includes adjustable feet or leveling shims, use them to make sure the shelf is perfectly level. A level shelf prevents items from tipping and reduces the risk of spills. After each shelf is in place, gently press along the front edge to confirm it’s locked in and won’t shift when you open or close the door. If you hear a click, that’s a sign the shelf is properly seated. For glass shelves, handle them with care during this step; a misfit can cause cracks.
Double-check the entire interior to confirm all shelves are aligned and stable. Remove any temporary supports and verify that nothing is protruding into the door’s swing path. A quick test with a few typical items—such as a bottle, a jar, and a box—lets you confirm that the spacing works for your real-life needs. If any shelf sits off level, adjust its height or re-seat the pegs until it sits evenly. This final step ensures your shelves will stay in place during daily use and that your fridge maintains proper airflow and cooling efficiency.
Troubleshooting common problems and finishing checks
Even with careful prep, you may encounter a few hiccups when putting refrigerator shelves back in. A common issue is resistance when sliding a shelf into place. This usually indicates misalignment or debris in the peg holes. Stop, remove the shelf, and inspect the holes for lint or crusted spills, then reinsert after cleaning. If a shelf won’t lock in, re-check the notch orientation, rails, and any retainer clips. Another frequent problem is shelves not sitting flush due to a slight tilt. In this case, recheck the level and adjust the shelf height on the rail to achieve a straight, even surface. If a peg or rail is damaged, replace it before reinstalling additional shelves to prevent further misalignment.
As you complete the process, recheck the interior dimensions by placing a few common items in a typical arrangement. Make sure heavy items aren’t pressing on the front edge, which can cause tipping or door misalignment. If you notice unusual noise when the door is opened or closed, inspect for loose screws in the hinge area and verify that shelves aren’t obstructing the door’s travel path. By following these checks, you can ensure a stable, well-functioning interior that will support your daily use and keep your perishables at the right temperature.
Maintenance tips after reinstallation
Once all shelves are back in place, it’s wise to perform a quick maintenance routine to extend their life and keep the fridge running efficiently. Wipe down shelves weekly to prevent sticky residues that can hinder sliding. Check the rails for any signs of wear or bending every few months, and replace if necessary. Keep the interior dry to prevent mold and odors—this is especially important after spills. Consider labeling shelf heights if you frequently reconfigure the interior for bulky items so you can quickly reproduce the setup in the future. Periodic checks help you learn how to put refrigerator shelves back in more efficiently the next time and protect your fridge’s cooling performance over time. Lastly, document any part replacements for future reference, so you know exactly what to replace if a shelf becomes loose again. How To Refrigerator stresses that routine maintenance reduces disruption and prolongs appliance life, keeping your kitchen running smoothly.
Tools & Materials
- Gloves (non-slip, kitchen-safe)(Protect hands and improve grip)
- Soft microfiber cloth(For drying and dust removal)
- Mild dish soap or gentle cleaner(Use with water for interior wipe-down)
- Replacement pegs or rails(Only if you notice wear or damage)
- Flashlight or phone light(Helpful to inspect peg holes)
- Flat-head screwdriver(Only if rails are screw-fastened)
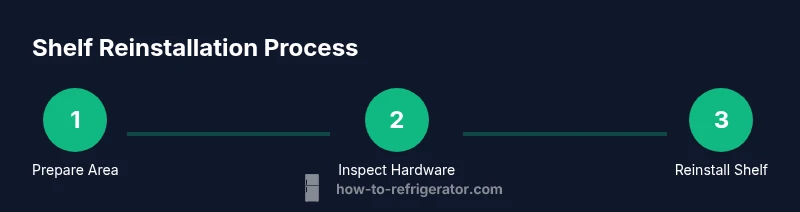
Steps
Estimated time: 15-25 minutes
- 1
Prepare and safety-check
Power down safely, clear the area, and put items on a stable surface. Inspect the interior for spills and damage. This ensures you won’t trap debris under a shelf or misalign the rails.
Tip: Take a quick photo of the current orientation to reference later. - 2
Remove the shelf and inspect hardware
Carefully lift the shelf away from the rails and inspect pegs, holes, and retaining clips for wear. Clean the shelf and the contact surfaces before reinsertion.
Tip: If a peg is loose or bent, stop and replace before continuing. - 3
Clean and dry the interior
Wipe down the rails and the shelf supports to remove spills or residue that can hinder sliding. A dry surface helps the shelf seat properly.
Tip: Dry thoroughly to prevent slips when sliding the shelf back in. - 4
Align the shelf guides
Position the shelf so the back edge sits on the rails or pegs and the front edge aligns with the front guide. Ensure notches and ridges line up with the corresponding guides.
Tip: Double-check the orientation against any labels or notches. - 5
Slide shelf into place
Gently slide the shelf from back to front, ensuring it sits evenly on the guides. Do not force; if resistance occurs, stop and recheck alignment.
Tip: Use a light touch to avoid chipping glass shelves. - 6
Lock and verify fit
Engage any retainer clips and confirm the shelf sits flush. Check that the shelf is level by feeling for wobble and correcting with height adjustments if needed.
Tip: Test with several items to ensure stability. - 7
Test operation
Open and close the door, then load a typical mix of items to confirm spacing and airflow. Re-check for any interference or misalignment.
Tip: If the door rubs against a shelf, recheck height settings on the adjacent shelves. - 8
Final clean-up and documentation
Wipe down tools, store spare pegs, and note the shelf heights for future use. Document any replacements for quick reference.
Tip: Keep a small note card with your preferred shelf heights.
FAQ
Why won’t my shelf fit after cleaning?
A shelf may not fit if the guides are misaligned or if debris remains in the peg holes. Recheck orientation, clean holes, and reseat the shelf slowly.
If a shelf won’t fit after cleaning, recheck alignment and clear any debris from the holes, then try again slowly.
Are glass shelves more fragile than wire shelves?
Yes. Glass shelves require careful handling and even support on both sides to avoid cracks. Wire shelves are more forgiving but can bend if forced.
Glass shelves are more fragile, so support them evenly; wire shelves are tougher but still avoid forcing.
Can I reinstall shelves without removing food?
In many cases you can, but it depends on your fridge layout. If you can access the shelf edges without obstruction, carefully slide it back in. If space is tight, remove some items for safety.
You often can reinstall without removing all food, but don’t push one shelf if it’s tight—clear space as needed.
What if the pegs or rails are damaged?
If pegs or rails are damaged, replace them before continuing. Damaged hardware can cause misalignment and compromise safety.
If you see damaged pegs or rails, replace them before reinstalling any shelves.
How can I tell if the shelves are level?
Place a small item on each shelf and check if it wobbles. If so, adjust the height or re-seat the shelf to ensure levelness.
Check for wobble with items on the shelf and adjust until it sits level.
Do all fridges use the same shelf hardware?
Not all models use identical hardware. Verify your user manual or model-specific images to ensure you’re using the correct pegs and rails.
Different models use different hardware; consult your manual for the exact pegs and rails.
Watch Video
Top Takeaways
- Identify shelf type and peg configuration.
- Clean and inspect before reinstall.
- Align guides and slide gently; avoid forcing.
- Verify height and stability for safe use.
- Document shelf positions for future reconfiguration.