How to Deal with Small Fridge: Troubleshooting Guide
Learn practical, safe steps to diagnose and fix common problems in a small fridge. This expert guide covers temperature, condensation, maintenance, and when to call a pro for compact units.

Learn how to diagnose and fix common issues with a small fridge. This guide walks homeowners through safe troubleshooting, simple maintenance, and practical fixes for temperature and moisture problems, plus when to call a professional. Follow a step-by-step process designed for compact units to extend life and efficiency. It includes a quick checklist, safety tips, and expected timelines.
Understanding the Constraints of a Small Fridge
For many homeowners, the challenge of how to deal with small fridge issues begins with understanding the unique constraints of compact units. Smaller interior volumes mean that air moves differently and that airflow can be easily blocked by shelves, containers, or poorly placed foods. In addition, door gaskets, condenser coils, and evaporator components are often more sensitive to dust, moisture, and improper loading. The How To Refrigerator team notes that keeping seals clean and coils dust-free is essential for reliable cooling in compact models. By recognizing these constraints, you can approach diagnostics with a clear plan, prioritize safety, and avoid unnecessary disassembly. This foundational knowledge helps you interpret symptoms like uneven cooling, frost buildup, or excess condensation without overspending on unnecessary replacements.
Common Symptoms and Root Causes
Small fridges frequently exhibit a handful of telltale symptoms: inconsistent cooling, frost or excess moisture, unusual noises, and doors that don’t seal properly. Root causes often include dirty condenser coils, failed door seals, poor airflow around vents, overfilled shelves, or incorrect thermostat settings. Before jumping to parts replacement, verify basic conditions: confirm the fridge is level, ensure the door seals are intact, and check that the vents aren’t blocked by items. Regular maintenance—such as coil cleaning and gasket inspection—can prevent most early-warning signs. According to How To Refrigerator Analysis, routine care is a cost-effective way to extend the life of compact units.
Temperature and Airflow Basics for Compact Models
Temperature stability in small fridges depends on consistent airflow and proper seal integrity. Overpacking can obstruct air circulation, while blocked vents trap cold air in one area and leave other zones warm. Ensure there’s space around stored foods and that air can circulate from the back panel to the shelves. Avoid placing hot items directly inside, which can cause temperature fluctuations. Use a fridge thermometer to verify the interior remains in the manufacturer-recommended range and adjust the thermostat gradually. This balanced approach helps prevent frost, uneven cooling, and excessive energy use.
Condensation, Frost, and Defrost Considerations
Condensation and frost buildup are common in compact fridges, especially in humid environments or when doors are opened frequently. Frost can insulate coils and reduce cooling efficiency, while condensation on shelves can indicate high humidity or improper loading. If you see frost forming on the evaporator or coils, allow the fridge to stabilize and consider a quick defrost if necessary. For manual defrost units, prepare for drainage and cleanup; for auto-defrost models, ensure the defrost cycle is functioning and vents aren’t blocked. Regularly cleaning the interior and wiping gaskets helps manage moisture levels and improves humidity control.
Safe Electrical Checks You Can Perform
Electrical checks should be done with the unit unplugged and powered down to avoid shocks. Start by inspecting the power cord for visible damage, ensuring the outlet is functioning, and testing the door switch if your model has one. If you’re comfortable with basic electronics, you can verify that the thermostat knob moves smoothly and that the fan (if accessible) runs quietly when the unit is plugged in. If you’re unsure about electrical components, skip this section and move to non-electrical checks or contact a professional. Remember: never bypass safety features or probes in the compressor area.
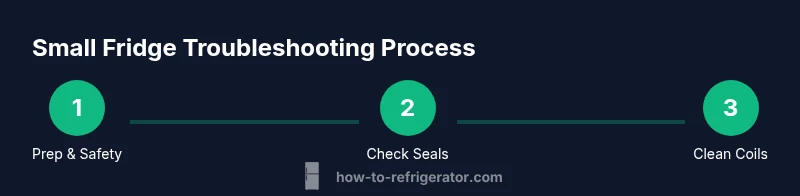
A Practical Triage Flow You Can Follow
Use a simple triage flow to quickly identify where the issue lies. Step 1: unplug, remove perishables, and clean the interior. Step 2: inspect door seals and gaskets for cracks or gaps. Step 3: check for blocked vents and ensure even shelf spacing. Step 4: clean condenser coils if accessible; step 5: verify thermostat settings with a thermometer. Step 6: plug back in and observe for 1–2 hours while monitoring temperatures. If the unit still struggles, proceed to more advanced checks or call a pro. This staged approach minimizes guesswork and avoids unnecessary replacements.
Cleaning and Routine Maintenance for Longevity
Regular maintenance is your best defense against frequent failures in a small fridge. Schedule monthly quick cleanings: wipe interior surfaces with mild soap and water, vacuum dust from coils if accessible, and inspect door gaskets for wear. Keep shelves organized to promote air circulation and prevent accidental blockages. Schedule deeper checks every 6–12 months, depending on usage. A proactive approach reduces energy consumption and helps maintain consistent cooling, reducing the risk of food spoilage.
Energy Efficiency and Layout Tips for Compact Models
Efficient small fridges optimize space and airflow. Avoid overloading and allow space around the back and sides for convection to work. Place frequently used items where cold air reaches first, not near the door, and keep warm items out of the fridge to prevent temperature spikes. Ensure the door seal is tight and replace worn gaskets promptly. Consider upgrading to a compact model with an energy-efficient compressor if efficiency has become a concern. Small changes in layout and maintenance add up to noticeable savings over time.
When to Consider Repair vs Replacement and Budgeting Basics
If a small fridge begins failing after basic troubleshooting, assess repair versus replacement. Evaluate the cost of parts and labor against the price of a new unit with similar capacity and energy efficiency. If the coil, compressor, or control board requires significant work, replacement is often more economical in the long run. Create a simple budget with a comfortable range and compare options. The How To Refrigerator team recommends planning ahead for peak seasons and selecting units with good energy ratings to minimize operating costs.
Special Cases: Ice Makers, Freezer Compartments, and Built-In Small Fridges
Some compact fridges come with ice makers or small freezers, which introduce additional failure points like clogged ice-maker lines or frost buildup in limited space. If your ice maker stops working, check the water line, auger, and bin for blockages. For small freezers, frost management is critical to maintain shelf space and cooling. Integrated or built-in compact models require careful installation and ventilation. Always refer to the model’s manual for any special steps and safety cautions before attempting intricate repairs.
Quick-Reference Troubleshooting Checklist
Keep this concise checklist handy: 1) verify door seals, 2) clear vents, 3) clean coils (if accessible), 4) confirm thermostat setting with a thermometer, 5) listen for unusual noises, 6) check drainage and defrost function, 7) observe cooling after reset. If issues persist after these steps, consult the manufacturer or a qualified technician. This checklist helps you stay organized during a troubleshooting session and reduces guesswork.
Tools & Materials
- Screwdriver set (Phillips and flat-head)(Assorted sizes suitable for appliance panels)
- Multimeter(For basic electrical checks; handle with care)
- Fridge thermometer(Place in main cavity to monitor temperature)
- Soft brush or microfiber cloth(Dust coils and wipe surfaces)
- Vacuum cleaner with brush attachment(Helpful for coil dust but not always accessible)
- Mild soap and warm water(Interior cleaning solution)
- Towels, baking soda optional(Spill cleanup and odor control)
- Owner’s manual or model number(Helpful for model-specific steps)
Steps
Estimated time: 60-90 minutes
- 1
Unplug and prep
Unplug the unit and move perishable items to a temporary cooler. Empty shelves where possible and take photos of settings for reference. This step reduces risk while you inspect controls and panels.
Tip: Have a timer ready to track cool-down and avoid leaving food exposed. - 2
Inspect door seals
Carefully examine gaskets for cracks, tears, or loose fit. Clean with warm water and mild soap to restore a tight seal. A compromised seal is a common cause of warm spots and condensation.
Tip: Close the door on a piece of paper—if it slips out easily, the seal may be worn. - 3
Check airflow and vents
Look for blocked vents inside or behind the fridge. Move items so air can circulate from top to bottom and reserve the doorway for door-specific cooling. Blocked vents disrupt temperature balance.
Tip: Avoid overfilling near vents to maintain consistent airflow. - 4
Clean condenser coils (if accessible)
Access coils from the back or bottom panel. Remove dust with a brush or cloth, then vacuum loose debris. Clean coils improve cooling efficiency and reduce energy use.
Tip: If you’re unsure about coil location, skip this step and limit to front-accessible parts. - 5
Check thermostat settings
Set the thermostat to the manufacturer-recommended level. Use a fridge thermometer to confirm stable temperatures within the expected range.
Tip: If you don’t know the recommended setting, start at mid-range and adjust gradually. - 6
Check drainage and defrost path
For frost-free units, ensure the defrost drain is clear. For manual defrost models, remove frost and drain accumulated water safely.
Tip: Be prepared with towels to catch water and avoid spills. - 7
Reconnect and test cooling
Plug the unit back in and allow 30–60 minutes for stabilization. Place the thermometer inside and verify the main compartments reach target temperatures.
Tip: Don’t overload during the first hour of testing. - 8
Listen for unusual sounds
While the fridge runs, listen for buzzing, clicking, or grinding noises that aren’t typical. Unusual sounds can indicate fan or compressor issues.
Tip: If you hear grinding, stop and consult a pro rather than continuing operation. - 9
Food organization and airflow
Ensure air can circulate around items and avoid blocking the vents with large containers. Organize shelves to promote even cooling across zones.
Tip: Keep hot items out of the fridge to prevent temperature spikes. - 10
Decide on repair vs replacement
Compare repair costs to the price of a similar-rated replacement. If major components need replacement, replacement may be more economical in the long run.
Tip: Get a written estimate before committing and check warranty coverage. - 11
Establish a maintenance plan
Create a simple schedule for monthly cleaning and six-month coil checks. Maintain logs to track improvements and recurring issues.
Tip: Set calendar reminders to stay consistent.
FAQ
Why is my small fridge not cooling evenly?
Uneven cooling often points to restricted airflow, a faulty door seal, or dusty condenser coils. Start by inspecting vents and seals, then clean coils if accessible. If the problem persists, test the thermostat and consider professional service.
Uneven cooling usually means airflow or seals are the issue. Check vents, seals, and coils, then test the thermostat before calling a pro.
How can I tell if condenser coils are dirty?
Coils that are dusty or greasy reduce cooling efficiency. Look for visible dust buildup on the back or under the unit and use a brush or vacuum to remove debris. If coils are hard to reach, hire a professional for a safe cleaning.
Dirty coils look dusty and clogged. Clean them gently, or have a pro handle it if they’re hard to reach.
Is manual defrost safe for a small fridge?
Manual defrost should be done carefully with the unit unplugged. Remove food, let frost melt, then catch the water with towels. After defrost, clean and resume normal use.
Yes, but unplug first and let frost melt, then clean up any water and plug back in.
Should I repair or replace a failing small fridge?
If multiple major components need work, replacement can be more cost-effective in the long run. Get a written estimate and compare to a similar new model with good energy efficiency.
If several parts need replacement, replacing the unit is often smarter. Compare costs before deciding.
How often should I clean the coils and seals?
Clean coils every 6–12 months depending on usage and dust exposure. Check seals monthly for wear and perform a quick wipe-down during routine cleanings.
Clean coils every 6 to 12 months and inspect seals monthly.
What safety steps should I follow when troubleshooting?
Always unplug before opening panels, avoid touching live electrical parts, and use insulated tools. If you’re unsure, stop and call a pro.
Always unplug first and don’t touch live parts. If unsure, call a pro.
Watch Video
Top Takeaways
- Identify root causes before replacing parts
- Keep door seals clean and coils dust-free
- Use a thermometer to verify temperature
- Follow a staged triage before calling a pro
- Maintain a regular cleaning schedule for longevity