Electrolux Refrigerator Fix: Step-by-Step Home Guide
A practical, safety-focused guide for homeowners to diagnose and repair common Electrolux refrigerator issues, with tool lists, step-by-step steps, and maintenance tips to restore cooling and efficiency.

Learn how to diagnose and fix common issues with an electrolux refrigerator, from not cooling to leaks, with confidence. This guide covers safety precautions, quick fault checks, and practical fixes you can perform before contacting service. Follow the step-by-step path to restore cooling, reduce energy use, and extend appliance life.
The Basics: Why Electrolux Refrigerators Fail and How to Approach Fixes
While Electrolux refrigerators are known for reliability, issues can arise from power problems, door seals, condensation, or defrost systems. A calm, methodical approach makes troubleshooting safer and more effective. According to How To Refrigerator, starting with a clear plan and documenting each checkpoint reduces time and minimizes risk. Before you touch any electrical components, unplug the unit, remove perishable items, and ensure you have good lighting. In this section we map common failure modes to practical checks you can perform without tools, and we outline a diagnostic mindset that carries through every subsequent step. You’ll learn to separate symptoms from root causes and to prioritize fixes that restore cooling first, then address efficiency and noise concerns. This guidance begins with a quick orientation on model-specific features for Electrolux refrigerators, including common control layouts and where to locate essential components. The aim is to empower homeowners to handle routine maintenance and minor repairs safely, using simple steps and reputable reference points from How To Refrigerator.
Not-Cooling Diagnoses: Quick Checks You Can Do
Not cooling is the most common complaint and can stem from several easy-to-fix culprits. Start with the power supply: confirm the outlet is live and the wall switch isn’t off. Next, inspect the door gaskets for cracks or dried-out seals; a poor seal lets cold air escape and triggers the compressor to run constantly. A quick condenser-coil check is also essential: dusty fins block heat transfer, forcing the system to work harder. If the model has a defrost drain, ice buildup can overwhelm the freezer and reduce overall cooling. Finally, verify the thermostat is not set too high or too low. If you find moisture or frost inside the evaporator area, the defrost cycle may be failing. How To Refrigerator’s guidance emphasizes documenting observed symptoms so you can compare against a structured checklist and avoid guessing. This section aligns practical checks with intuitive reasoning to help you decide when the issue is simple versus when professional service is prudent.
Safety Essentials for DIY Refrigerator Troubleshooting
Safety is non-negotiable whenever you work around electrical appliances. Always unplug before handling any interior or exterior components. Use insulated tools, wear gloves, and keep children away from the work area. If you must power-test components, use a non-contact voltage tester and never touch live conductors directly. When dealing with refrigerant lines or the compressor, stop immediately if you detect hissing sounds, burning smells, or warm surfaces—they indicate a serious fault that requires professional service. Store perishable items in a cooler during any outage and avoid attempting complex refrigerant work yourself. These precautions reduce risk and make your repairs more reliable. Remember that serious issues may involve sealed systems, which require licensed technicians. This section reinforces a safety-first mindset that protects you and your home while you pursue fixes.
Inspecting the Condenser Coils and Evaporator Drain
Condenser coils should be clean and free of dust for efficient heat rejection. Locate coils (usually behind a grille or underneath the unit) and carefully vacuum or brush away debris. If you see heavy grime, wipe with a damp cloth and a mild detergent, then vacuum again to remove loosened particles. After cleaning, let the coils dry completely before restoring power. The evaporator drain is another critical path; a clogged drain can trigger overflow or ice buildup. Use a small, flexible brush to dislodge blockages and flush with warm water. If you notice ongoing drainage problems, consider using a defrost-safe warning to remind yourself to inspect the drain path seasonally. Keeping coils clean not only reduces noise but also maintains efficiency and can extend the life of the compressor.
Signs of a Failing Defrost System and How to Test
Modern Electrolux refrigerators rely on a defrost cycle to keep frost from forming on the evaporator. If frost accumulates, the system may be stuck in defrost or the heater may be failing. A simple test is to listen for the heater relay on a cold cycle and feel for heat near the evaporator fins after a 20- to 30-minute operation. If there is no heat, the defrost timer, defrost thermostat, or defrost heater could be defective. Another indicator is frost on the interior walls that persists despite running the compressor. If you suspect a defrost problem, do not attempt to melt frost with excessive heat or tools; improper defrost work can cause water leaks or damaged coils. Always consult the service manual for your Electrolux model. This section emphasizes catching defrost issues early to avoid costly refrigerant-related complications.
Energy Efficiency and Long-Term Maintenance
Regular maintenance helps an Electrolux refrigerator run efficiently and reduces energy usage over time. Clean gaskets, coils, and seals; ensure proper air flow around the unit; and keep the space well ventilated. How To Refrigerator analysis shows that proactive cleaning and timely part replacements can lower running costs and extend the appliance’s life. Scheduling two 15-minute maintenance sessions per year—one before summer and one before winter—can catch wear before it leads to bigger faults. Additionally, monitoring door seal integrity and temperature consistency with a simple thermometer can help you identify energy-wasting leaks. Small upgrades, like a properly sized rug or mat under the unit to improve airflow in crowded kitchens, can contribute to overall efficiency and reduce heat exchange around the appliance.
Routine Maintenance You Can Do Every Six Months
This practical maintenance checklist keeps your Electrolux refrigerator performing at its best. Wipe down the interior with a mild cleaner; vacuum coils (or wash with a gentle brush if accessible); inspect door seals; and verify temperature stability by placing a candy or dairy thermometer at different shelves. If your model has an ice-maker or water dispenser, flush lines and replace filters per manufacturer guidance. Record service dates and any unusual noises or temperature fluctuations to share with a technician. This routine reduces the chance of unexpected breakdowns and helps you catch wear before it disrupts daily life. Complementary tasks include checking the defrost drain for clogs, ensuring proper level placement, and validating fan operation to minimize nuisance noises.
Verdict: When to Repair vs. Replace
Based on the symptoms and the cost of components, most common Electrolux refrigerator issues can be resolved with DIY steps or professional service. The How To Refrigerator team recommends initiating repairs promptly if you notice persistent not-cooling, water leaks, frost buildup, or abnormal noises. If the refrigerator is older than 10-12 years and repair costs approach new appliance pricing, replacement may be more economical. In any case, prioritize safety, verify warranty coverage, and choose a technician who has experience with Electrolux models. Regular professional tune-ups can extend life and maintain energy efficiency. This section provides a practical framework to decide between repair and replacement, balancing cost, reliability, and long-term value.
Tools & Materials
- Phillips head screwdriver set(Sizes #1 and #2 recommended)
- Flat-head screwdriver(For prying panels if needed)
- Multimeter or voltage tester(To test electrical components safely)
- Soft brush or microfiber cloth(For dust and coil cleaning)
- Vacuum with brush attachment(Coil and vent cleaning)
- Mild dish soap and spray bottle(Cleaning interior surfaces)
- Thermometer (fridge compartment)(Check temperature consistency)
- Gloves and eye protection(Safety first during inspections)
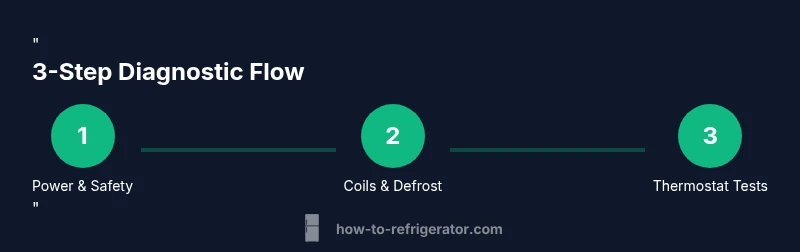
Steps
Estimated time: 60-90 minutes
- 1
Power down and safety check
Unplug the refrigerator and remove items from the interior. Confirm the area around the unit is dry and you have adequate lighting. This protects you from electrical shock and makes inspection safer.
Tip: Always unplug before touching any interior components; never work with wet hands near live parts. - 2
Check power supply and outlets
Verify the outlet is active using a tester. If other devices work in the same outlet, rule out power supply issues and test the cord for damage. A tripped circuit or switched outlet could mimic many other problems.
Tip: If the outlet is controlled by a switch, ensure it is in the ON position before proceeding. - 3
Inspect door seals and gasket integrity
Close the door on a sheet of paper; if you can pull it out easily, the gasket may be worn and causing air leaks. Clean the gasket with mild soap and water and check for tears. Replace damaged gaskets if needed to restore sealing performance.
Tip: Avoid using harsh cleaners that can degrade rubber seals. - 4
Clean condenser coils
Locate the condenser coils (often behind a grille or underneath). Use a soft brush or vacuum to remove dust. Wipe with a damp cloth, then dry completely before powering up again to prevent short cycling.
Tip: Do not use high-pressure water; it can damage components. - 5
Test thermostat and temperature settings
Ensure the interior temperature is in the manufacturer-recommended range and that the thermostat control is not stuck. Adjust in small increments and allow 4–6 hours to stabilize; record temps to compare over time.
Tip: Avoid placing hot items directly in the fridge to prevent temperature spikes. - 6
Check defrost drain and ice-maker (if present)
Inspect the defrost drain for blockages; an ice buildup can affect cooling efficiency. If your model has an ice-maker, flush water lines as per the manual. Do not attempt refrigerant work yourself.
Tip: If you see persistent frost, this may indicate a defrost heater or timer issue needing service. - 7
Run a test cycle and observe performance
Plug the unit back in and run the compressor for a few hours while monitoring cold air from vents and door seals. Listen for unusual noises that could indicate fan or motor problems. Document changes and compare to expected performance.
Tip: Record daily temperatures for a week to detect slow drift.
FAQ
Why is my Electrolux refrigerator not cooling?
Not cooling can stem from power issues, thermostat problems, dirty coils, or a defective defrost system. Start with basic checks and progress to component testing as needed.
If your Electrolux refrigerator isn’t cooling, check power, thermostat, coils, and the defrost system first.
Is it safe to unplug and inspect my fridge?
Yes, unplugging before inspection is safest. Use insulated tools, avoid touching live parts, and keep liquids away from electrical components.
Yes, unplug first and proceed with caution around electrical parts.
How often should I clean the condenser coils?
Clean condenser coils at least twice a year or whenever you notice visible dust. Regular cleaning helps maintain efficiency and extend compressor life.
Clean the coils twice a year to keep efficiency up and wear down less on the compressor.
What does frost in the freezer indicate?
Persistent frost can indicate a defrost system problem or air leaks. It’s worth testing the defrost cycle and inspecting gaskets for proper sealing.
Frost usually means a defrost issue or a seal problem; test the cycle and check seals.
When should I call a technician for an Electrolux fridge?
If cooling doesn’t improve after basic checks, if you hear unusual noises, or if there’s refrigerant exposure or suspected sealed-system issues, seek professional service.
Call a tech if basic fixes don’t help or you hear strange noises.
Will replacing the defrost drain fix leaks?
A clogged defrost drain can cause leaks, but leaks may also come from seals or hose connections. Inspect all pathways and follow the manual before replacing parts.
Drain issues can cause leaks, but inspect seals and hoses too before replacing parts.
Watch Video
Top Takeaways
- Power down before any inspection
- Clean coils and seals regularly
- Document symptoms and results
- Know when to call a technician