How to Clean Condenser Coils on a Refrigerator
Learn how to safely clean condenser coils on a refrigerator to boost efficiency, reduce noise, and extend appliance life with this step-by-step DIY guide from How To Refrigerator.

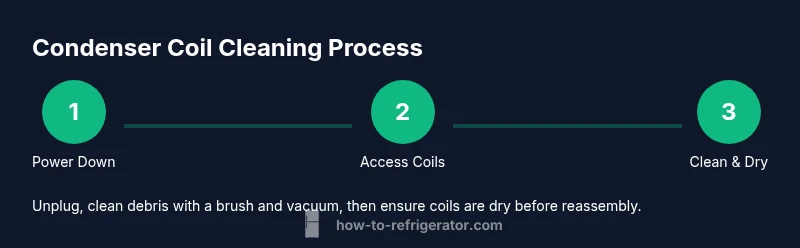
Cleaning the condenser coils on a refrigerator can restore cooling efficiency and lower energy use. This guide walks you through required tools, safety steps, and a clear, step-by-step process to safely remove dust and debris from the coils without bending fins or damaging components. By following these steps, you’ll achieve a noticeably cooler fridge and lower utility bills.
Why Cleaning Condenser Coils Matters
A clean condenser coil refrigerator is essential for efficient heat rejection. When dust, pet hair, and kitchen grease accumulate on the coils, the compressor runs longer and harder to remove heat. This not only wastes energy but can shorten the appliance’s lifespan. Regular, careful cleaning keeps heat flowing away from the compressor, maintains optimal temperatures, and reduces the chance of overheating. For homeowners aiming to save money and extend the life of their fridge, routine coil maintenance is a smart investment. According to How To Refrigerator analysis, a well-maintained condenser coil can contribute to noticeable energy savings over time, especially in homes with dusty or high-traffic kitchens. Prioritize the task in a dry, well-lit area so you can see fine dust and avoid missing debris.
Safety First: Power, Access, and Prep
Before you touch any components, ensure your safety and the appliance’s protection. Unplug the fridge and turn off any nearby breakers to eliminate the risk of shock. Move furniture or appliances aside to give yourself a clean workspace and prevent tripping hazards. If your model has a back panel, remove it carefully following the manufacturer’s guidelines. Keep metal panels and fasteners organized to avoid losing parts during reassembly. Remember, work slowly and deliberately; rushing can bend fins or dislodge wiring. From a safety and longevity perspective, take breaks if you feel fatigued, and never attempt this task with the fridge plugged in.
Understanding Condenser Coils and Common Debris
Condenser coils dissipate heat from the refrigerator’s coolant loop. In open-housing configurations, coils sit behind the back panel or beneath the unit, where they collect dust, hair, and lint. Debris acts like an insulating layer, reducing airflow and forcing the compressor to work harder. It’s common to see a noticeable buildup in homes with pets or in dusty environments. The goal of cleaning is to remove loose dust and debris while preserving the coil fins’ integrity. If you see bent fins, use a gentle touch to straighten them with a fin comb or similar tool. A careful approach helps prevent long-term performance issues and ensures you aren’t introducing new damage during cleaning.
Accessing Condenser Coils: Front, Back, and Bottom Configurations
Coil access varies by model. Some refrigerators expose coils from the back, others from a front grill or a bottom panel. For back configurations, you’ll typically remove a back access panel or ventilated grille. For bottom-access models, you may need to tilt the fridge slightly and remove a bottom kick panel. Always consult your user manual for exact steps, because improper panel removal can cause refrigerant or electrical issues. If you encounter stubborn covers, use the appropriate screwdriver and avoid prying with excessive force. Mylar or plastic barriers should be kept intact to prevent debris from entering the interior.
Cleaning Methods: Dry Debris Removal, Vacuum, and Gentle Brushing
Begin with dry debris removal to avoid creating a mess. Use a soft brush to loosen dust from between fins, then vacuum with a brush attachment to suck up loosened debris. A narrow crevice tool helps reach tight gaps without bending fins. When using a vacuum, work slowly and keep the nozzle a safe distance from the fins to avoid damage. For stubborn buildup, a gentle damp cloth can remove surface grime, but avoid soaking coils or saturating the area. If you see stubborn residue, switch to a dedicated coil cleaning brush for targeted action. Remember, the objective is to remove buildup while preserving coil integrity and airflow.
Step-by-Step Cleaning Process (Overview) and Post-Clean Checks
After you’ve removed debris, inspect the coils for any signs of damage or bent fins. If fins are bent, use a fin comb to restore airflow. Allow the coils to air dry completely before reassembling any panels. Reconnect the power, plug in the fridge, and slide it back to its original position. Listen for normal compressor operation and check that interior temperatures stabilize in a reasonable timeframe. A visible improvement in cooling consistency often accompanies a successful clean condenser coil refrigerator task.
Drying, Reassembly, and First Run
Once you’ve finished cleaning, give the coils a final wipe with a dry microfiber cloth to remove any residual moisture. Reattach the back panel or kick plate, ensuring all screws are snug but not overtightened. Plug the unit back in and push it gently into its normal location. Allow 1–2 hours for the appliance to stabilize, then verify that the freezer and fresh food compartments are cooling properly. If temperatures remain high, recheck the coil area for missed debris or loose panels. Proper drying and reassembly are critical to avoiding leaks or recontamination.
Verifying Performance and Energy Savings After Cleaning
With coils clean and dry, monitor the fridge’s performance over the next several hours. A decrease in run time and shorter cycling intervals typically indicate improved heat transfer and efficiency. You may notice a modest drop in energy use as the compressor doesn’t have to run as long to maintain set temperatures. For many homeowners, the change is subtle but real, especially in warmer months when the demand on the cooling system is higher. If you have a smart meter or energy monitor, compare readings before and after cleaning to quantify the impact. Remember, consistency matters—regular maintenance helps sustain efficiency gains over time.
Maintenance Schedule and Preventive Tips to Keep Coils Clean
Establish a simple maintenance cadence to prevent heavy buildup. In dusty homes or households with pets, aim for a light cleaning every 3-6 months. In cleaner environments, twice a year may be sufficient. Use a monthly quick dust-off using a microfiber cloth to keep the area around the coils clear. Keep the area around the fridge free of clutter to ensure unobstructed airflow. Consider placing a low-dust mat beneath the appliance to reduce floor dust that can be drawn into the coils. A proactive approach yields the best long-term results for your refrigerator’s performance and energy efficiency.
Common Pitfalls and How to Avoid Them
Avoid cleaning with high-pressure water directly on the coils; this can bend fins and push debris deeper into crevices. Don’t force panels open if you’re unsure of the attachment points—consult the manual or a professional. Never use harsh chemical cleaners, solvents, or abrasive tools on delicate coil fins. If you’re uncertain about accessing certain configurations, skip to the safer option of scheduling a professional service. Finally, avoid running the fridge while you’re cleaning a panel or behind the back area to prevent accidental contact with electrical components.
Tools & Materials
- Vacuum cleaner with hose and brush attachment(Choose a model with good suction and a narrow attachment to reach between fins)
- Soft-bristle coil cleaning brush(Specifically designed for fins; do not use stiff metal brushes on plastic fins)
- Microfiber cloths(Used for dry dusting and gentle wiping of surfaces)
- Bucket of warm water with mild dish soap(Optional for stubborn grime; avoid soaking coils)
- Old toothbrush or small brush(Useful for stubborn debris in tight gaps)
- Safety gloves(Protect hands from sharp fins and debris)
- Safety glasses(Protect eyes when brushing or working near moving parts)
- Fin comb (optional)(Helpful for straightening bent fins without damage)
- Small flashlight or headlamp(Improves visibility behind panels)
Steps
Estimated time: 75-120 minutes
- 1
Power down and prepare
Unplug the refrigerator and move it away from the wall to access the coils. Ensure the area is dry and well lit. If you must move the unit, have an assistant to avoid injuring yourself or damaging flooring.
Tip: Save time by clearing the area first; you’ll thank yourself during cleanup. - 2
Identify coil access point
Determine whether your coils are behind the back panel, under a grille, or at the bottom. Reference the manual to locate the exact access point. Do not pry panels; use the proper tool to remove screws or fasteners.
Tip: Take a quick photo of screw placement for easier reassembly. - 3
Loosen loose dust with a dry brush
Gently brush the coil surfaces to loosen loose dust. Work across the surface in straight strokes to avoid bending fins. Avoid heavy scrubbing on delicate fins.
Tip: Keep strokes light to prevent damage. - 4
Vacuum between fins
Attach the brush nozzle and vacuum from the outside inward, aiming to lift dust away rather than pushing it deeper. Move slowly and methodically across the entire coil surface.
Tip: Use a crevice tool for tight gaps. - 5
Target stubborn grime with a brush
For areas with built-up grime, use a soft coil cleaning brush or an old toothbrush to loosen deposits between fins. Do not use metal tools on plastic fins.
Tip: Maintain a light touch to preserve fin integrity. - 6
Wipe down with a damp cloth
If needed, wipe surfaces with a damp microfiber cloth. Avoid soaking the coils; excessive moisture can seep into components and cause issues.
Tip: Use a minimal amount of water and ring out well. - 7
Dry thoroughly before reassembly
Let the coils dry completely before closing panels. Moisture left behind can cause corrosion or mold growth in tight spaces.
Tip: Better to wait an extra 10-15 minutes than to rush. - 8
Reattach panels and screws
Securely reattach any access panels, grills, or back covers. Confirm all screws are tight and the panel sits flush to prevent rattling.
Tip: Hand-tighten first, then snug with a tool to avoid over-tightening. - 9
Plug in and reposition the fridge
Carefully push the unit back into place and reconnect the power. Ensure cords aren’t pinched and that the unit is level for proper operation.
Tip: Use a level to ensure stability on the floor. - 10
Initial test run
Turn the fridge on and monitor for normal fan sounds and cycling. Check interior temperatures after a few hours to confirm proper cooling.
Tip: If temperatures rise, recheck for debris or misalignment. - 11
Assess performance and dryness
Observe whether the appliance runs less and maintains temperature more efficiently. If there’s no improvement, there may be another issue requiring professional care.
Tip: Document symptoms in case you need to call a pro later. - 12
Schedule future maintenance
Set a reminder for regular coil checks—dusty environments may require more frequent cleaning. This proactive habit prevents performance loss and keeps energy use lower.
Tip: A simple calendar reminder makes upkeep automatic.
FAQ
Do I need to unplug the fridge before cleaning the condenser coils?
Yes. Always unplug the fridge and switch off the circuit to eliminate the risk of electric shock while you work on the coils.
Yes—unplug the fridge and switch off the circuit before you start cleaning to stay safe.
Can I use water directly on the coils?
Use a damp cloth or a vacuum with a brush attachment for most cleaning. Avoid soaking the coils; excess moisture can penetrate seals and electrical components.
You should avoid soaking the coils; use a damp cloth or vacuum with care.
How often should I clean condenser coils?
In dusty environments or homes with pets, aim for every 3-6 months. In cleaner settings, twice a year may be sufficient.
Every three to six months in dusty homes, or twice a year in cleaner environments.
What if I can’t access the coils easily?
If access requires disassembly you’re uncomfortable with, or you see signs of damage, consult a professional. Improper disassembly can void warranties or cause leaks.
If access is tough or you see damage, it’s best to call a professional.
Will cleaning improve cooling performance?
Yes. Clean coils dissipate heat more effectively, which can reduce run time and improve overall temperature stability.
Cleaner coils usually mean cooler, more efficient operation.
What cleaners are safe to use on coils?
Stick to mild soap and water or a dedicated coil cleaning product recommended by the manufacturer. Avoid harsh solvents and abrasive scrubbers.
Use mild soap and water or a manufacturer-recommended coil cleaner.
Watch Video
Top Takeaways
- Unplug before starting to avoid shock.
- Use gentle tools to protect delicate fins.
- Dry thoroughly before reassembly to prevent corrosion.
- Regular maintenance improves efficiency and longevity.
- If in doubt, consult a professional.