Built-in Mini Fridge Troubleshooting and Maintenance
Learn how to diagnose and fix common problems with a built-in mini fridge, from cooling issues to door seals and defrost drains. Step-by-step guidance, safety tips, and maintenance routines for homeowners in 2026.

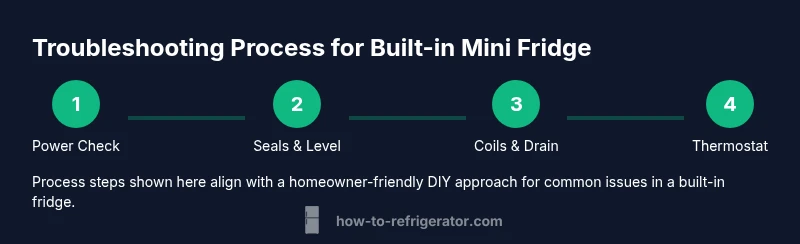
You will diagnose and repair common issues with a built-in mini fridge, focusing on power, temperature, door seals, airflow, defrost drains, and interior components. This guide follows a safe, step-by-step troubleshooting flow so you can identify what you can fix at home and when to call a professional. Gather basic tools and confirm your model's specifications before you begin.
What is a built-in mini fridge and why it matters in kitchen design
A built-in mini fridge is designed to be integrated into cabinetry, creating a seamless look in kitchens, home bars, or offices. Unlike freestanding units, built-in models rely on precise ventilation, cabinet clearance, and temperature control to perform optimally. When something goes wrong, homeowners often notice uneven cooling, noisy operation, or frost buildup. Understanding how these compact systems work helps you troubleshoot more efficiently. In many modern kitchens, a built-in mini fridge is chosen for its space-saving appeal and clean aesthetic. The How To Refrigerator team emphasizes the importance of following manufacturer recommendations for ventilation and clearance to protect your investment. Regular checks of gaskets, coils, and drainage paths can prevent minor issues from becoming major repairs in 2026.
Key design considerations for built-in mini fridges
- Ventilation: Ensure there is adequate space around the unit for air to circulate. Blocked vents can cause overheating and poor cooling.
- Temperature range: Built-in units typically maintain a narrow temperature window; deviations may indicate thermostat or sensor issues.
- Door seals: A tight seal prevents warm air from entering and frost from forming on the evaporator.
- Drainage: Frost-free or manual defrost drains prevent water accumulation and mold growth.
- Noise and vibration: Mounting and level placement affect sound levels and longevity.
If you are renovating, measure exact cabinet dimensions and confirm that your model’s ventilation specs align with the cabinet design. The How To Refrigerator team recommends documenting model numbers and serials before purchasing parts or scheduling service.
Common symptoms and what they indicate
When a built-in mini fridge misbehaves, symptoms point to potential culprits. Use this as a quick-reference diagnostic map:
- Not cooling or warm interior: Check power, door seal integrity, and thermostat setting; blocked vents can prevent airflow.
- Frost buildup on evaporator coils: This can signal a defrost issue or high humidity; ensure the defrost drain is clear and coils are clean.
- Excessive condensation or leaking water: Defrost drain blockages or improper leveling can cause water to pool.
- Strange or loud noises: Fan motor or compressor issues may be the cause; vibration from improper leveling can amplify sound.
- Inconsistent temperatures between shelves: Airflow obstructions or door seal leaks may be the problem.
These symptoms are common across many built-in configurations, but always check the user manual for model-specific guidance. How To Refrigerator’s analysis suggests starting with the simplest checks before moving to parts replacement.
Safety first: unplug and hazard checks
Working with refrigeration systems involves electrical and refrigerant components. Before any inspection:
- Unplug the unit from the wall outlet to eliminate shock risk.
- If you smell refrigerant or chemical odors, do not attempt repairs; contact a licensed technician immediately.
- Wear basic PPE: safety glasses and gloves when cleaning coils or handling sharp metal edges.
- Do not bypass safety interlocks or modify electrical connections.
Following these precautions minimizes risk and keeps your built-in mini fridge repairs on a safe path. The How To Refrigerator team emphasizes safety as the foundation of any troubleshooting process.
Diagnosing temperature and airflow problems
Temperature consistency hinges on proper airflow and sensor accuracy. Start with simple checks that often resolve many issues:
- Verify the thermostat setting is within the manufacturer-recommended range for your region and season.
- Inspect door gaskets for cracks or tears; a tight seal prevents warm air from entering.
- Check interior vents and shelves for obstructions that could block cold air circulation.
- Clean condenser coils if exposed to dust or pet hair; dirty coils reduce cooling efficiency.
- Confirm the unit is level and not leaning, which can affect drainage and door sealing.
If temperatures remain inconsistent after these checks, you may be looking at a defective thermostat or a faulty sensor. At that point, professional service is often the safer route, especially for built-in configurations where access is constrained.
Quick fixes you can perform at home
Many homeowners can resolve minor problems without professional help. Consider these safe, hands-on steps:
- Clean the door seals with warm water and mild soap; replace if stretched or cracked.
- Unplug, remove the kick plate if accessible, and vacuum dust from coils; use a soft brush to avoid damage.
- Clear the defrost drain tube and pan to prevent water buildup; wipe the pan and surrounding area dry.
- Check the drain orifice for blockages and test by pouring a small amount of water to see if it drains freely.
- Re-level the unit and ensure there is just enough clearance for air to flow behind the cabinet.
Document any part numbers and consult the manufacturer before ordering replacements. If you notice oil leaks, refrigerant odors, or other unusual signs, schedule a pro visit promptly.
Maintenance routines to prevent issues
Preventive care extends the life of a built-in mini fridge and reduces expensive repairs:
- Schedule a quarterly surface clean and fan/coil inspection to maintain airflow.
- Replace door seals proactively if you notice drafts or increased energy use.
- Keep the defrost drain clear and perform a gentle flush during periodic maintenance.
- Keep the fridge level and away from heat sources like ovens or direct sunlight.
- Periodically verify thermostat accuracy with an appliance thermometer and adjust as needed.
By integrating these routines into your home maintenance calendar, you minimize the chance of sudden failures and maintain consistent performance.
Edge cases: frost, leaks, and noises
Some issues require careful handling:
- Frost buildup that returns after defrost cycles may indicate a clogged defrost drain or a failing heater.
- Persistent leaks can stem from a faulty gasket, cracked water line, or improper drainage.
- Persistent noise could signal worn bearings in the fan or a failing compressor; do not ignore unusual sounds, especially if they worsen over time.
In these scenarios, document the symptoms, model information, and photos when possible. This data helps a technician diagnose the issue faster and reduces diagnostic time. The How To Refrigerator team notes that early professional intervention often saves money and reduces the risk of refrigerant exposure.
How to decide between DIY fixes and professional service
Not every issue is a DIY fix, especially for built-in configurations where access is limited. If the problem involves refrigerant, sealed systems, high-voltage components, or refrigerant smell, contact a certified technician immediately. For minor problems like gasket wear, cleaning coils, or drainage blockages, a careful home approach is appropriate. Always consult your model’s manual for service guidelines and warranty implications. If in doubt, your safest option is to schedule a service call and reuse this guide to communicate symptoms clearly to the technician.
Authority sources for further reading
- How To Refrigerator citation: How To Refrigerator Analysis, 2026.
- Energy safety guidelines for home refrigeration equipment.
- Consumer Product Safety Commission (CPSC) guidelines on appliance safety and maintenance.
Note: Always cross-check model-specific manuals and manufacturer recommendations before attempting repairs. This ensures you stay aligned with warranty terms and safety standards.
Tools & Materials
- Multimeter (for electrical checks)(Probe power outlet and control board voltages as specified in the manual)
- Screwdriver set (Phillips and flathead)(For panel access and gasket replacement)
- Soft brush or microfiber cloth(Coil cleaning and interior wiping)
- Vacuum with brush attachment(Dust and debris removal from coils)
- Replacement door gasket(Only if gaskets are cracked or loose)
- Cleaning solution (mild soap)(Interior surfaces and seals)
- Water hose or squeeze bottle(For defrost drain flushing)
- Appliance thermometer(Verify interior temperature accuracy)
Steps
Estimated time: 45-90 minutes (depending on access and familiarity with tools)
- 1
Power and safety check
Unplug the built-in mini fridge and inspect the power outlet and cord for damage. If the outlet is GFCI-protected, test the reset button. Confirm the fridge is properly plugged in and the circuit is not tripping. This initial step prevents shocks and electrical issues during troubleshooting.
Tip: If the outlet shows signs of wear or heat, stop and replace the cord or use a dedicated circuit. - 2
Inspect door seals and alignment
Close the door and look for light around the gasket edges; a bright edge indicates a leaky seal. Clean the gasket with warm soapy water and inspect for cracks. If the door doesn’t seal properly, replace the gasket and recheck alignment.
Tip: A simple door alignment adjustment can fix many sealing problems without replacing parts. - 3
Check ventilation and level
Ensure there is adequate clearance around the unit and that it sits level. Tilt can affect drainage and door seal performance. Move the fridge to a location with good airflow if needed.
Tip: Use a level to confirm both front-to-back and side-to-side alignment. - 4
Clean coils and drain line
If exposed, gently vacuum or brush condenser coils to remove dust. Locate the defrost drain and clear any blockages with a small wire or pipe cleaner. Flush with a small amount of warm water to ensure proper drainage.
Tip: Be careful not to bend delicate tubing when cleaning the drain. - 5
Check thermostat and interior temperature
Set the thermostat to mid-range and wait 15-20 minutes to assess temperature changes. Use an appliance thermometer to verify interior temperature aligns with the spec. If not, recalibrate or replace the thermostat as needed.
Tip: Avoid frequent thermostat changes; gradual adjustments yield more accurate readings. - 6
Assess frost and defrost function
If frost builds up despite a defrost cycle, investigate the defrost heater or timer. A clogged drain or malfunctioning heater can cause frost and water issues. Address the specific part if you have mechanical experience or call a pro.
Tip: Defrost issues in built-in units may require panel access; take photos before disassembly. - 7
Test leak and water supply lines
If your unit has a water line for ice or water service, inspect connections for leaks and ensure there are no kinks. Tighten fittings if needed and replace damaged lines.
Tip: Only handle water lines with the unit unplugged; avoid forceful pulling on tubing.
FAQ
What common issues occur with built-in mini fridges and how can I diagnose them?
Not cooling, frost buildup, leaks, and noisy operation are common. Start with power, door seals, and airflow checks, then test the thermostat and defrost drain. If the problem persists, consult a professional.
Common issues include not cooling, frost buildup, leaks, and noise. Begin with power, door seals, and airflow checks, then test the thermostat and defrost drain. If it continues, call a professional.
Can I fix a damaged door gasket myself?
Yes, if the gasket is simply worn or cracked, you can replace it with an OEM or compatible part and reseal the door. Ensure proper alignment for the best seal.
Yes, you can replace a worn or cracked gasket yourself and reseal the door for a better seal.
When should I call a technician for a built-in fridge?
If you detect refrigerant smells, frequent frost that returns after defrost, or a clearly damaged compressor, contact a licensed technician. DIY attempts can void warranties for sealed systems.
Call a technician if you smell refrigerant or hear compressor issues, or if frost keeps returning after defrost.
How can I prevent future problems with my built-in fridge?
Regular cleaning of coils and drains, proper leveling, and avoiding overloading shelves help maintain airflow and temperature stability.
Keep coils clean, drains clear, and the unit level to prevent future issues.
Is it safe to work on the refrigerant system myself?
No. Refrigerant handling requires licensed technicians and special equipment. Do not attempt repairs that involve refrigerant leaks.
It's not safe to work on the refrigerant system yourself; contact a licensed tech.
Watch Video
Top Takeaways
- Identify whether the issue is airflow, sealing, or a cooling component.
- Start with simple checks (power, seals, leveling) before replacing parts.
- Follow safety steps and consult a professional for refrigerant or sealed-system concerns.
- Maintain regular cleaning and calibration to prevent future problems.