How to Clean a Fridge with Mold: Safe, Effective Steps
Learn to safely remove mold from your fridge, disinfect shelves and seals, prevent recurrence, and protect your family with How To Refrigerator's expert, step-by-step guide for homeowners.

You will learn how to safely remove mold from a fridge, disinfect shelves and gaskets, and prevent future growth. Before you start, unplug the unit, move food to a cold space, wear protective gloves and a mask, and ventilate the area. This guide covers safe cleaners, step-by-step actions, and signs when professional service is needed.
Understanding Mold in Refrigerators
Mold can grow inside a fridge when moisture lingers on shelves, gaskets, and bins after spills or power outages. In most cases, common mold colonies are not only unsightly but can affect taste and release spores that drift through the unit. Health concerns vary with mold type, but persistent growth deserves attention, especially in homes with children, elderly adults, or anyone with allergies. The key is to act quickly, clean thoroughly, and dry all surfaces completely. This section explains the science behind fridge mold and why it’s more about dampness than cleanliness alone. By understanding causes—condensation, food residues, clogged orifices, and infrequent defrosting—you’ll know what to target during cleaning and maintenance. How To Refrigerator’s approach emphasizes safety, sanitation, and preventive habits to minimize recurring mold problems for homeowners.
Safety First: Gear and Ventilation
Before you begin, protect yourself with appropriate PPE and ensure good airflow in the kitchen. Wear nitrile gloves, a mask rated for particulates or mold, and splash-proof eyewear if you’re cleaning tight corners. Open windows or turn on a vent fan to reduce inhalation risks from mold spores and from any cleaning fumes. If you’re sensitive or have respiratory issues, pause and consult a professional. This step prioritizes reducing exposure while you work, because mold exposure can irritate skin, eyes, and lungs. Remember to keep children and pets away during the cleaning window.
Assessing Contamination and Food Safety
Inspect every shelf, bin, and door seal for visible mold and moisture buildup. If food has mold or seems spoiled, discard it safely in sealed bags and remove it from the kitchen. Use a flashlight to check crevices where mold can hide, including the condenser coils if accessible. Take photos or notes of affected areas to guide cleaning and future inspections. If the mold covers large areas (more than a few square inches) or you notice persistent dampness, consider pausing and consulting a professional. This evaluation helps you decide whether you can proceed with DIY cleaning or require service.
Cleaning Solutions: When and What to Use
You have a few safe options for fridge mold cleanup, depending on your sensitivity and cleaning preferences. White distilled vinegar is a forgiving, non-toxic option that disrupts mold growth. Baking soda paste can scrub stubborn spots without harsh chemicals. For sanitizing, hydrogen peroxide or a mild bleach solution can be effective if used correctly and thoroughly rinsed. Avoid mixing cleaners, especially bleach with ammonia, which creates dangerous fumes. Apply cleaners with a spray bottle or damp cloth, let them sit briefly, and wipe away residue. Always test a small area first and ensure you don’t damage coatings or gaskets.
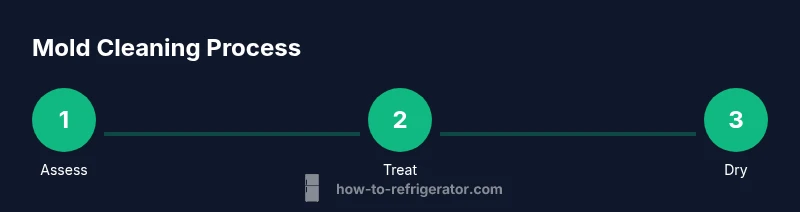
Cleaning Process Overview
The cleaning process boils down to four phases: remove, treat, rinse, and dry. Start by removing all items from the fridge and taking out shelves for separate cleaning. Treat moldy areas with your chosen cleaner, ensuring contact time follows label directions. Rinse surfaces to remove cleaner residue, then dry completely with clean towels or a microfiber cloth. Reassemble, return items, and monitor for any signs of new mold over the next few days. This section gives you a practical mental model for the full DIY cleanup, keeping steps organized and repeatable.
Prevention: Keeping Mold at Bay
Mold thrives in moisture, so the long-term strategy is moisture control and routine upkeep. Check door seals for gaps and replace if worn. Clean the drain hole and defrost drain as needed to prevent standing water. Keep the fridge at the recommended temperature and avoid overloading shelves, which can impede airflow. Regularly wipe down interior surfaces and promptly address spills to minimize residue. Establish a monthly quick clean to catch early signs of humidity buildup.
When to Call a Professional
If mold returns quickly after cleaning, if you notice staining that won’t scrub away, or if you have health concerns, it’s prudent to seek professional help. A technician can assess insulation, seals, and hidden crevices that DIY cleaners can’t reach. If you suspect the issue is structural, electrical, or involves the condenser coils, don’t delay—professional assessment protects your home and health. This final cue helps homeowners decide when DIY ends and expert intervention begins.
Tools & Materials
- Nitrile gloves(Essential for skin protection while handling mold.)
- Protective mask (N95 or better)(Reduces inhalation of mold spores.)
- Safety goggles(Optional but helps prevent splashes.)
- Mild dish soap(For initial grime and residue.)
- White distilled vinegar(Non-toxic option that fights mold.)
- Baking soda(For paste scrubs and deodorizing.)
- Hydrogen peroxide 3%(Sanitizes without harsh chemicals.)
- Bleach (dilute according to label)(Use only for stubborn mold; ensure ventilation.)
- Spray bottle(Keeps solutions ready for application.)
- Microfiber cloths(Soft, non-scratch cleaning and quick drying.)
- Old toothbrush(For crevices and gasket edges.)
- Trash bags(Seal moldy items securely before disposal.)
- Plastic spatula or scraper(Gently lift debris without scratching.)
Steps
Estimated time: 60-90 minutes
- 1
Unplug and Clear
Unplug the fridge to prevent electrical hazards and open space for cleaning. Remove perishable items and relocate them to a cold area. Take out shelves, drawers, and bins if possible to access all mold-prone surfaces.
Tip: Take photos of shelf layout before removing anything to aid reassembly. - 2
Remove Moldy Items
Discard any food that shows visible mold or off smells in sealed bags to prevent cross-contamination. Place trash in a sealed bag and dispose of it outside your kitchen promptly.
Tip: Double-bag questionable items to minimize spore escape. - 3
Pre-Clean Interior
Lightly wipe away loose residue with a damp cloth or dry brush to reduce spreading spores. Vacuum hard-to-reach corners if a vacuum with a HEPA filter is available, then wipe with a clean cloth.
Tip: Use a separate cloth for moldy areas to avoid cross-contamination. - 4
Apply Cleaning Solution
Apply your chosen cleaner to moldy areas and let it sit for several minutes as directed. Vinegar or baking soda paste are good non-toxic options; avoid mixing cleaners.
Tip: Do not spray widely; target affected zones to limit moisture exposure. - 5
Rinse and Sanitize
Rinse cleaned areas with plain water and wipe dry. For sanitizing, apply hydrogen peroxide or a labeled bleach solution if needed, then rinse again and dry thoroughly.
Tip: Dry surfaces completely to prevent rapid mold recurrence. - 6
Dry and Reassemble
Reinstall shelves and drawers once fully dry. Return items to the fridge and monitor for 24-72 hours. Keep the door slightly ajar after cleanup on initial days to aid drying if needed.
Tip: Keep the fridge slightly ajar for 1-2 hours after drying in a well-ventilated area.
FAQ
What causes mold to grow in a fridge?
Mold grows where moisture lingers on surfaces like shelves, gaskets, and bins after spills or power interruptions. Humidity and spoiled food can accelerate growth, so quick cleaning helps prevent it.
Mold grows where moisture sticks around—wipe spills fast and dry surfaces to stop it.
Is it safe to clean mold with bleach in the fridge?
Bleach can be effective if used with ventilation and thorough rinsing. Never mix with ammonia or acids, and avoid overuse near food-contact surfaces.
Bleach can work, but ventilate well and rinse completely; don’t mix with ammonia.
Should I throw away moldy foods even after cleaning?
Yes. If food is moldy or suspicious, discard it in a sealed bag to prevent cross-contamination. Clean containers and surfaces after disposal.
If food is moldy, throw it away to stay safe and clean.
How often should I clean my fridge to prevent mold?
Aim for a quick interior wipe at least once a month and address spills immediately. A deeper clean is sensible every 2-3 months or after a power outage.
Clean the inside monthly and wipe up spills right away.
Can mold return after cleaning?
It can return if moisture remains or seals are damaged. Regular maintenance and checking for leaks help prevent recurrence.
Yes, if moisture or leaks stay, mold can come back. Fix moisture to prevent it.
Watch Video
Top Takeaways
- Inspect for moisture and seals first.
- Use non-toxic cleaners when possible.
- Dry thoroughly to prevent recurrence.
- Seal and sanitize, then monitor for signs of mold.