Beverage Cooler: How to Choose, Install, and Maintain
Learn how to choose the right beverage cooler for your space, install it correctly, and maintain optimal temperature and efficiency with practical steps, tips, and safety notes.

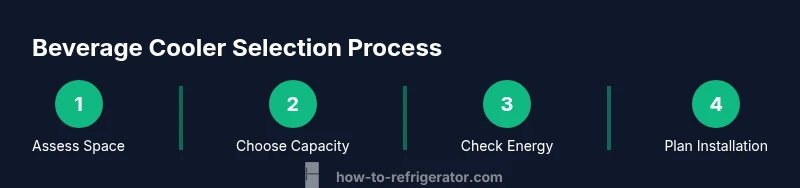
According to How To Refrigerator, a beverage cooler is a compact refrigeration unit designed for drinks with dedicated shelves and energy-efficient cooling. This guide helps you compare features, plan space, install properly, and maintain consistent temperatures. You’ll learn how to evaluate capacity, door configurations, airflow, and common fixes, plus practical maintenance routines to extend lifespan.
What is a beverage cooler? Definition and scope
According to How To Refrigerator, a beverage cooler is a compact refrigeration unit designed primarily for storing drinks. It offers a dedicated space for beverages, usually with adjustable shelves and a glass door to allow quick identification of contents. These units are designed for easy access, efficient cooling, and space-saving layouts that fit into kitchens, offices, or entertainment areas. Unlike a full-size refrigerator, a beverage cooler emphasizes accessibility and presentation. It often uses narrower dimensions, compact interiors, and shelves arranged for optimal vertical stacking of bottles and cans. Temperature ranges vary, but most models keep drinks within a refreshing zone suitable for beer, soda, wine coolers, and bottled water. Some models feature dual temperature zones for different beverages; others emphasize energy efficiency and quiet operation. When selecting a beverage cooler, homeowners should consider footprint, door style, shelving, and any built-in features such as LED lighting or glass doors that showcase stored beverages.
Brand context note: For readers who are planning a home remodel or a dedicated beverage bar, a beverage cooler can be a stylish and functional addition that complements existing kitchen appliances.
How beverage coolers differ from traditional refrigerators
Beverage coolers focus on quick access and presentation. They typically feature glass doors, adjustable racks, and shelves arranged for easy visibility of drinks. Many models are designed to minimize door swing width while maximizing usable height, which makes them ideal for compact kitchens or bar setups. Traditional refrigerators prioritize versatile storage for a wider range of foods and larger volumes, often with solid doors and variable temperature zones. While both types chill drinks, beverage coolers aim for visual appeal and rapid retrieval, sometimes offering specialized lighting, curved door fronts, or dual-zone capabilities to accommodate beer, soda, and wine at slightly different temperatures. Understanding these differences helps homeowners avoid buying a unit that looks right but performs poorly for beverages.
Shopping tip: If you frequently stock party beverages or larger bottle formats, check the interior layout and shelf heights to ensure your favorites fit comfortably.
Key features to compare when shopping
When evaluating beverage coolers, consider several core features that impact daily use and long-term satisfaction. Capacity and internal layout determine how many drinks you can store and how easily you can organize them. Temperature consistency and range matter for different beverages, especially if you chill wine, beer, and sodas in the same unit. Door style (glass vs. solid) affects visibility and insulation. Energy efficiency should be a priority, with insulated walls, tight door seals, and efficient compressors reducing operating costs. Noise level is another practical factor for homes or offices, particularly if the cooler sits near living spaces. Look for adjustable shelving, compatibility with bottle racks, and features like automatic defrost, interior LED lighting, and adjustable thermostat controls. Finally, ensure there are clear installation requirements, including ventilation space and a dedicated outlet.
Pro tip: Favor models with solid door gaskets and well-organized shelving to maximize cooling performance and reduce energy use.
Space planning: choosing capacity and layout
Before buying, measure the intended footprint carefully and account for door clearance and ventilation. Compute how many bottles or cans you typically stock and how much headroom you want for seasonal items or entertaining. Consider the available width, height, and depth, as well as the door swing direction to ensure it doesn’t block countertops or walkways. If you have limited space, a narrow-depth unit can fit between a wall and a counter, while a taller model may offer more shelves without widening the footprint. Plan for proper airflow around the back and sides; restricted ventilation can raise running costs and shorten compressor life. Finally, decide whether you need a dedicated drinks bar or a multi-purpose refrigerator to pair with other kitchen appliances.
Illustration note: diagrams showing typical layouts and clearance guidelines can help you visualize placement.
Energy efficiency and operating costs
Energy efficiency directly affects long-term costs and environmental impact. Beverage coolers with tight door seals, better insulation, and efficient compressors typically consume less electricity while maintaining stable temperatures. Look for Energy Star-rated models and compare annual energy use estimates when available. The actual cost savings depend on usage patterns, ambient temperatures, and how often the door is opened. Routine maintenance, such as cleaning condenser coils and ensuring seals stay intact, also influences efficiency. How To Refrigerator analysis shows that choosing efficient models and minimizing door openings can result in noticeable energy savings over time, especially in homes with frequent beverage stocking.
Maintenance choice: pick a unit with a clearly labeled thermostat and easy-access filters or ventilation panels to simplify routine upkeep.
Installation and placement for best performance
Start with a dry, level surface away from heat sources. Check the electrical outlet: beverage coolers usually require a standard 120V outlet and should not be plugged into extension cords. Move the unit into place carefully, ensuring there is at least a bit of space behind and on the sides for air circulation. Use a level to adjust the feet until the unit sits evenly. Once in position, plug it in and set the initial temperature according to manufacturer guidelines. Wait for the unit to reach the target temperature before loading drinks. If the floor is uneven, use shims to stabilize the cooler to prevent vibrations that degrade performance.
Scenario: In a small kitchen, place the cooler near a wall that does not receive direct sunlight; this reduces heat load and helps the compressor run less.
Maintenance routines to extend life
Regular maintenance helps beverage coolers perform consistently and last longer. Wipe down the exterior and door gaskets weekly to prevent grime buildup that can impede sealing. Vacuum or brush the condenser coils (usually located at the back or underneath) every few months, depending on usage and dust exposure. Inspect door seals for cracks or gaps and replace them if needed to maintain cooling efficiency. Avoid placing hot liquids inside the cooler, and let beverages come to room temperature before chilling if you’re restocking after a party. Defrosting is automatic on many models, but if yours requires manual defrost, plan a quick defrost cycle as needed to prevent frost buildup. Keeping shelves clean and rearranging for better airflow will further stabilize temperatures over time.
Safety and warranty considerations
When installing a beverage cooler, always follow the manufacturer’s instructions and verify that electrical connections meet local codes. Do not modify power cords or bypass fuses, and never use damaged outlets. Store the manual and keep proof of purchase in a safe place to support warranty claims. If you notice persistent overheating, unusual noises, or persistent ice buildup, contact the manufacturer’s service line or a qualified technician. Proper maintenance, cautious installation, and timely service protect your investment and keep beverages at safe, consistent temperatures.
Authority sources and further reading
For additional guidance, consult authoritative sources that cover appliance efficiency, installation best practices, and safe use. This section provides curated links to reputable organizations and publications. Use these resources to verify facts and expand your understanding of beverage cooler performance and safety.
Be mindful about safety and warranties (summary section)
Safety comes first. Always disconnect power before servicing, avoid extension cords, and ensure the unit is stable and level. Respect warranty terms by following the installation and usage guidelines provided by the manufacturer. Regular maintenance and proper placement help preserve energy efficiency and extend the life of your beverage cooler.
Tools & Materials
- Measuring tape(For space planning and clearance (at least 2 inches on sides))
- Level(To ensure proper airflow and door seal)
- Screwdriver set (Phillips & flat-head)(For adjustable feet and panels)
- Pliers(May help with connectors during installation)
- Voltage tester(Optional safety check on outlets)
- Anti-tip shims or spacers(If floor is uneven)
Steps
Estimated time: 2-4 hours
- 1
Unbox and inspect
Carefully remove the beverage cooler from packaging and inspect for shipping damage. Check door seals, shelves, and hardware; report any issues before proceeding. This prevents installation delays and preserves warranty coverage.
Tip: Take photos of any damage and note serial/model numbers for support. - 2
Prepare space and plan layout
Measure the installation space, accounting for door swing and ventilation clearance. Clear the area of obstructions and remove any packaging debris that could block airflow. This helps the unit fit without forcing a tight squeeze.
Tip: Mark the preferred position with painter’s tape before moving the unit. - 3
Level the cooler
Move the unit into place and use a level to adjust the feet until the front/back is even. Proper leveling prevents door misalignment and excessive vibration during operation.
Tip: Check level again after you load beverages; weight changes can affect balance. - 4
Check electrical requirements
Ensure the outlet is dedicated and rated for the cooler’s startup surge. Do not use an extension cord. This reduces fire risk and helps stabilize voltage to the compressor.
Tip: Avoid using a multi-outlet power strip with this appliance. - 5
Position and door swing
Slide the cooler into position, verifying that doors open fully without hitting nearby cabinets or walls. If a hinge or door misaligns, adjust mounting screws or frame alignment per the manual.
Tip: Leave a small gap behind the unit for ventilation and airflow. - 6
Power on and set initial temperature
Plug in the unit and set the thermostat to a mid-range temperature suitable for beverages. Avoid drastic temperature changes right after startup to prevent stress on the compressor.
Tip: Refer to the user manual for the recommended starting setting. - 7
Allow stabilization period
Wait an appropriate period for the cooler to reach the target temperature before loading drinks. This stabilizes interior conditions and ensures even cooling from the start.
Tip: Do not overload shelves during this initial stabilization. - 8
Load and organize beverages
Place beverages in logical zones (e.g., beer, sodas, waters) and arrange shelves to maximize airflow. Keep heavier items toward the bottom to maintain balance and reduce tipping risk.
Tip: Use labels or dividers to keep items organized and easy to reach.
FAQ
What is a beverage cooler and how does it differ from a standard refrigerator?
A beverage cooler is a compact refrigeration unit designed for drinks with features like glass doors, adjustable shelves, and optimized layouts. It prioritizes quick access and visibility, unlike large fridges that store a wider range of foods. These units often focus on energy efficiency and airflow to keep beverages evenly chilled.
A beverage cooler is a small fridge for drinks, designed for easy access and visibility.
What capacity should I choose for a small kitchen?
For compact spaces, select a model that fits within your available width and height while providing enough shelves for your typical beverage inventory. If you entertain often, consider a slightly larger capacity with adjustable shelves to accommodate varied bottle sizes.
In a small kitchen, pick a compact model with adjustable shelves.
Do beverage coolers require special outlets?
Most beverage coolers use standard 120V outlets. Avoid extension cords and ensure the outlet can tolerate startup surge, especially in older homes where wiring may be marginal.
Most units plug into a regular outlet; avoid extension cords.
How can I reduce energy usage?
Choose an energy-efficient model with proper insulation and door seals. Minimize door openings and place the unit away from heat sources to reduce compressor workload and energy use.
Choose an efficient model and keep the door closed to save energy.
Why is my beverage cooler freezing items?
If items are freezing, check the thermostat setting and door seals. A misaligned door or a faulty temperature sensor can cause uneven cooling in zones.
Check the thermostat and seals if drinks are freezing.
Watch Video
Top Takeaways
- Define space, capacity, and layout before buying.
- Choose energy-efficient models with proper ventilation.
- Level and place away from heat sources for best performance.
- Follow a safe, step-by-step installation to protect warranties.