Samsung Side-by-Side Fridge Freezer: A Practical Troubleshooting Guide
A homeowner-friendly guide to diagnose, maintain, and repair a Samsung side-by-side fridge freezer. Learn safety tips, common symptoms, and step-by-step fixes to keep your appliance running efficiently.

Learn how to diagnose and fix common problems with a samsung side by side fridge freezer. This guide covers quick checks, safe disassembly, and practical maintenance to improve cooling, reduce frost, and prevent leaks. You’ll need basic tools, patient steps, and a plan to identify root causes before calling a technician.
Understanding the Samsung side-by-side fridge freezer
Samsung side-by-side fridge freezers are known for generous storage and advanced features like adjustable shelves, ice makers, and water dispensers. While these systems deliver convenience, they also introduce model-specific quirks. For homeowners troubleshooting issues, it helps to understand the basic layout: the refrigerator compartment, the freezer column, the condenser behind the backside panel, and the evaporator inside the freezer or fridge depending on the model. If your unit is frost-free, you may still see occasional frost right after a power interruption or after heavy door usage. Efficient operation hinges on tight door seals, clean condenser coils, and properly set temperatures.
From a maintenance perspective, the goal is simple: keep airflow unblocked, prevent overloading the doors, and ensure a consistent, even temperature across compartments. How To Refrigerator notes that regular maintenance reduces unexpected breakdowns in Samsung side-by-side fridges, reinforcing the value of a proactive care routine. Always reference your specific model number for wiring diagrams and service panels, but the general troubleshooting steps below apply across most Samsung side-by-side fridge freezer configurations.
Common symptoms and quick diagnostics
Not cooling, excessive frost, or unusual noises are common reasons homeowners search for help. Start with a quick visual check: verify the door seals are intact and free of cracks, inspect for obvious frost buildup on the evaporator, and confirm the condenser area at the back is free of dust. If you notice water pooling inside the fridge or leaking onto the floor, the defrost drain or water line may be blocked. A consistent ice maker that stops producing ice or a water dispenser that drips can also indicate a valve or line issue. Listen for a louder-than-normal compressor hum, which can signal that the unit is struggling to reach the set temperature.
These symptoms point you toward a few focused checks: door gasket integrity, defrost system function, airflow clearance, and temperature stability. For safe, effective diagnostics, document the symptom, note the temperature readings, and check for recent outages or power fluctuations. This approach helps you identify whether the issue is user-serviceable or requires professional service. How To Refrigerator’s analysis shows that disciplined diagnostic notes improve resolution time when addressing complex refrigerator problems.
Safety first: power down and handling basics
Before you touch any internal components, unplug the unit and wait at least 5 minutes to allow capacitors to discharge. Do not use metal tools near the sealed refrigerant loops or gaskets, and avoid bypassing safety switches. If you’re uncomfortable with disassembly or if you hear hissing sounds or smell refrigerant, stop and call a pro. Always work on the appliance in a well-lit, dry area and use insulating gloves to guard against sharp edges.
When testing control panels or fans, use a non-contact thermometer to verify temperatures without opening and closing doors repeatedly. Keep children and pets away during maintenance. For safety, never attempt to repair refrigerant lines yourself; this requires licensed refrigeration work.
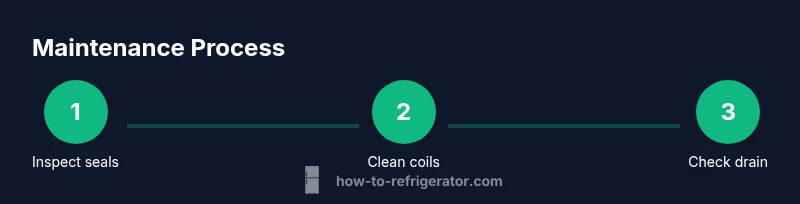
Routine maintenance to prevent problems
Regular maintenance is the best defense against common fridge/freezer problems. Schedule seasonal checks: inspect door seals for cracks or shrinks, clean condenser coils (back of the unit) every 6–12 months, and verify that vents under shelves are not blocked by food items. Clean the interior with a mild solution and a soft cloth; avoid harsh chemicals that can damage plastics. If your model includes an ice maker, run a cleaning cycle per the user manual to prevent buildup.
Proactive steps include setting consistent temperatures (generally around 37–40°F for the fridge and 0°F for the freezer), ensuring the defrost drain is clear, and keeping the unit level for proper door alignment. These practices help maintain efficient cooling and extend the appliance’s life.
Troubleshooting flowchart: diagnose, then decide
This flowchart outlines a practical approach to decide whether a problem is user-serviceable or requires professional help:
- Symptom identified → 2) Check door seals and airflow → 3) Inspect defrost and drainage → 4) Check condenser cleanliness → 5) Verify temperature settings → 6) If issues persist, schedule service.
If at any point you encounter refrigerant lines, electrical harnesses, or unusual noises, pause and contact a qualified technician. Following a systematic flow reduces unnecessary disassembly and helps you isolate root causes more efficiently.
Authority sources and further reading
- How To Refrigerator Analysis, 2026: Homeowner-friendly guidance on practical fridge maintenance and troubleshooting.
- Energy.gov: Refrigerator and freezer efficiency and safe operation.
- NIST resources on household refrigeration systems and safety practices.
Note: Always refer to your model’s user manual for model-specific steps and safety warnings.
Tools & Materials
- Phillips screwdriver (PH2)(For service panels and screws.)
- Flat-head screwdriver(Careful prying around panels.)
- Nut driver set (4–10 mm)(Useful for loose bolts on some models.)
- Multimeter (optional)(For checking electrical continuity.)
- Soft cloths and mild cleaner(Interior cleaning and wiping coils.)
- Vacuum with brush attachment(Condenser coil cleaning (back of unit).)
- Towels or mats to catch spills(Safety and cleanup during defrost checks.)
Steps
Estimated time: 60-90 minutes
- 1
Power down and safety check
Unplug the fridge and wait 5 minutes to discharge capacitors. Confirm the area is dry and clear of obstructions. This prevents shocks and protects delicate components during inspection.
Tip: Label wires before disconnecting any harnesses to simplify reassembly. - 2
Locate model and service panels
Find the model number on the door frame or interior wall. Remove the rear access panel if present, using the screwdriver to access the condenser area and look for obvious dust or loose connections.
Tip: Take a photo of interior panels for reference when reassembling. - 3
Check the door seals
Inspect door gaskets for cracks, dryness, or deformation. A leaky seal can cause frost and temperature instability. Clean with a mild soap solution and dry before test closing.
Tip: Close the door on a dollar bill template; if you can pull it out easily, the seal may be worn. - 4
Inspect defrost drain and frost buildup
If frost is present around the evaporator, you may have a defrost issue or blocked drain. Manually clear frost with a plastic tool and check the drain tube for obstructions.
Tip: Never use sharp tools on the evaporator; you could puncture fins or piping. - 5
Clean condenser coils
Dusty condenser coils reduce cooling efficiency. Vacuum the coils from behind the unit or gently wipe with a brush. Reassemble after drying.
Tip: Only power the unit after coils are completely dry to avoid short circuits. - 6
Verify temperature settings
Ensure fridge is around 37–40°F and freezer at 0°F. If temperatures drift, adjust controls gradually and monitor for 24–48 hours.
Tip: Record initial readings; allow 24 hours between adjustments to gauge effect. - 7
Ice maker and water line checks
If ice production is inconsistent or leaks occur, inspect the water line and valve for kinks or frost. Clear any ice jams and inspect the ice maker mechanism for proper operation.
Tip: If the line is frozen, run the dispenser for a few seconds to thaw the line safely. - 8
Test and observe
Reassemble, plug in, and run the unit. Check that the fridge cools and the freezer maintains frost-free operation. Monitor for 24–48 hours before concluding.
Tip: Keep a log of temperature and frost status during the first 2 days after service.
FAQ
Why is my Samsung side-by-side fridge freezer not cooling properly?
Not cooling can result from door leaks, dirty condenser coils, or a faulty defrost cycle. Start by inspecting door seals and ensuring adequate airflow. If temperatures stay high, check the condenser and evaporator for frost buildup and verify the temperature settings.
Not cooling often comes from door gaskets or blocked airflow. Check seals, then inspect coils and defrost components if the issue persists.
How do I reset a Samsung side-by-side fridge freezer?
Many Samsung models offer a soft reset by unplugging for 5 minutes or using the control panel to reset settings. Always refer to your model's manual to determine the correct reset procedure.
Try unplugging the unit for five minutes, then plug it back in and allow it to reboot. If available, use the reset option in the control panel per your manual.
What causes frost buildup in the freezer compartment?
Frost buildup can be caused by door leaks, frequent door openings, a faulty defrost heater, or restricted airflow. Address the door seals, clear the defrost drain, and ensure the freezer fan is functioning.
Frost usually means airflow or defrost issues; fix door leaks and clear the defrost path.
Is it safe to manually defrost a Samsung fridge?
Manual defrost can be performed carefully if frost buildup is excessive, but you should unplug the unit, use towels to collect water, and avoid using sharp metal tools. If in doubt, contact a professional.
Yes, you can manually defrost with caution, unplugging first and using towels to catch water.
When should I replace the water filter on a Samsung side-by-side fridge?
Water filter replacement is typically recommended every 6–12 months, depending on usage and water quality. Signs include reduced flow, cloudy ice, or off-tasting water.
Replace the filter about once a year, or sooner if you notice reduced water flow or taste changes.
Watch Video
Top Takeaways
- Diagnose symptoms with a systematic flow.
- Prioritize safety and model-specific guidance.
- Regular coil cleaning supports efficiency and cooling.
- Only perform basic maintenance; call a pro for refrigerant or electrical work.