How to Keep Your Refrigerator From Rolling
Learn proven, homeowner-friendly steps to stop a rolling fridge. Level, anchor, and cushion your appliance with anti-tip hardware and non-slip mats—trusted guidance from How To Refrigerator.

You can stop a rolling refrigerator by leveling it, adding anti-tip hardware, and using a non-slip mat. Start by checking the floor for flatness, then adjust the refrigerator’s leveling feet until the top is even and the doors stay aligned. Attach anti-tip brackets if recommended for your model, and place a non-slip mat under the unit. These steps reduce movement and reduce noise.
Why a Rolling Refrigerator Matters
Movement of a refrigerator is more than just an annoyance; it can stress door seals, misalign shelves, damage walls, and cause hazards in busy kitchens. According to How To Refrigerator, taking control of how your fridge sits can save energy by keeping the compressor cycle consistent and prevents uneven wear on the casters. In most homes, a combination of floor irregularities, heavy door loads, and occasional floor soap or debris under the feet contributes to slipping and shifting. The good news is that you can usually prevent movement with a few practical steps: verify floor flatness, level the unit, and install anti-tip hardware or high-friction mats. Mastering these adjustments reduces noise, protects cabinetry, and extends appliance life. If you’re wondering how to keep refrigerator from rolling, the core ideas are simple and actionable, even for first-time DIYers.
Common causes of movement on different floors
Different floor surfaces interact with fridge feet in unique ways. On smooth tile or hardwood, even small gaps can let the unit slide when doors are opened or during foot traffic. Vinyl floors may compress slightly under heavy loads, increasing movement. On carpet, especially pile fibers, a fridge's weight can shift with footfalls or when people lean on it. In all cases, poor leveling magnifies movement. How To Refrigerator analysis shows that the biggest predictor of rolling is failure to achieve a true level across the width and depth of the cabinet. A level fridge minimizes door misalignment and ensures energy efficiency as the compressor cycles smoothly. Regular inspections help catch changes caused by repositioning items or cleaning.
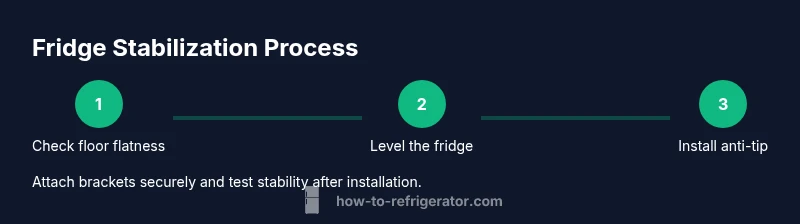
Core methods to prevent movement
The primary levers are leveling, anti-tip hardware, and floor contact. First, adjust leveling feet so the fridge sits squarely with the top parallel to the countertop; use a bubble level across the top and tweak each foot in small increments. If the floor isn’t perfectly flat, consider shims or thick rubber pads under feet to bridge gaps. Next, install anti-tip brackets or locking straps that secure the unit to a wall or cabinet frame. Follow manufacturer instructions and avoid overtightening. Finally, add non-slip mats or friction pads under the feet to dampen movement during door operations and kitchen activity. If you live on carpet or soft flooring, look for high-friction pads designed for furniture fixtures and verify they don’t obstruct ventilation.
Practical steps you can take today
You can start with a quick assessment: clear space around the base, unplug safely, and wipe dust from the feet. Move the fridge a few inches to inspect the floor for debris and level against a straight edge. Check whether front-to-back and side-to-side levels are even using a bubble level. If the floor is uneven, place appropriate shims or a non-slip pad under the feet until the fridge sits stably. Finally, decide whether anti-tip brackets are feasible for your setup and install them per the manufacturer’s instructions. Testing after each adjustment helps ensure the fridge remains stationary during typical household activities.
When to call a professional
If you’ve tried leveling, added mats, and installed brackets but still notice movement on soft carpet, vinyl-rich floors, or after loads change inside the fridge, a pro assessment may be needed. A professional can verify wall anchorage, bracket compatibility with your model, and ensure the cooling airflow isn’t obstructed by added mounts. The goal is a secure, level appliance without compromising safety or warranty terms.
Tools & Materials
- Adjustable leveling feet wrench(Use the tool supplied with the fridge or a standard adjustable wrench; keep feet from slipping while turning.)
- Anti-tip brackets or straps(Attach to a wall stud or cabinet frame per manufacturer guidance; ensure brackets sit flush.)
- Non-slip floor mats or vibration pads(Place under feet; choose mats that offer grip without compressing too much.)
- Shims(Use plastic or rubber shims to fill gaps on uneven floors; avoid gaps under feet that can compress over time.)
- Measuring tape(Confirm width and depth clearance; helps in precise leveling and bracket placement.)
- Drill/driver with screwdriver bit(For mounting brackets and securing feet; wear eye protection.)
- Safety glasses(Protect eyes during drilling and bracket installation.)
- Marker or painter’s tape(Mark bracket placements and drilling holes; keeps lines visible.)
Steps
Estimated time: 30-60 minutes
- 1
Inspect space and floor
Clear the area around the fridge, unplug safely if needed, and inspect the floor for debris or uneven patches. Gather all tools and ensure you have a helper if the fridge is heavy. This prep helps prevent accidental slips and ensures accurate leveling.
Tip: Have a helper hold the fridge steady while you check the floor clearance. - 2
Level front-to-back and side-to-side
Place a bubble level on the top edge of the fridge and adjust each leveling foot in small increments. Start at the front corners and work toward the back until the surface is even across both axes. Re-check after moving items inside the fridge.
Tip: Adjust feet in tiny increments (1/8 to 1/4 turn) and recheck often. - 3
Install anti-tip brackets
Locate studs or use wall anchors and secure anti-tip brackets to the fridge and wall or cabinet frame. Ensure brackets are aligned with manufacturer holes and sit flush against surfaces. This prevents tipping during door swings and heavy loads.
Tip: Do not overtighten; contact a professional if you encounter studs or mounting conflicts. - 4
Add floor protection mats
Place non-slip mats or vibration pads under each foot. They provide friction and help absorb minor shifts from everyday activity. Make sure mats stay dry and clean.
Tip: Check mats for wear and replace if they become scuffed or compressed. - 5
Test stability
Gently push on the top corners and doors to test movement. If there’s any slid,e re-check leveling or bracket tightness. Confirm doors still align and seal properly.
Tip: Open and close doors to verify clearance and avoid contact with surrounding cabinets. - 6
Address tricky surfaces
If movement persists on carpet or uneven surfaces, consider relocating to a firmer area or upgrading to high-friction pads designed for furniture.
Tip: Avoid blocking vents or airflow around the condenser coils during upgrades.
FAQ
Will anti-tip brackets damage walls or walls studs?
If installed correctly, anti-tip brackets should not damage walls. Use wall studs or appropriate anchors and follow the manufacturer’s instructions. If you’re unsure, consult a professional.
When installed properly, anti-tip brackets don’t damage your walls, but make sure you anchor into studs and follow the directions. If in doubt, get a pro to install.
Do leveling feet require professional installation?
Most refrigerators can be leveled by the homeowner using the adjustable feet and a level. If you encounter stuck or difficult-to-reach feet, consult the manual or a technician.
You usually can level with the built-in feet. If the feet are hard to reach, check the manual or call a pro.
Can I use duct tape or mats on carpet to stop rolling?
Non-permanent methods like tape are not recommended for long-term use, as they can fail or leave residue. Use purpose-made non-slip pads or anti-slip mats designed for carpets.
Avoid tape; use non-slip pads designed for carpets for a secure fix.
Is it safe to move the fridge myself to level it?
Moving a fridge yourself can be risky due to weight and refrigerant lines. For leveling in a fixed setup, aim to minimize movement and, if necessary, enlist help or call a pro.
It can be risky to move a fridge alone. Get help or hire a pro for significant repositioning or leveling.
What if my floor is uneven and I can't level the fridge?
If leveling feet cannot fully compensate, use a combination of shims and high-friction mats. In persistent cases, consider re-flooring or relocating to a more stable area.
If feet don’t level a bit, use shims or better mats, or think about relocating to a steadier spot.
How do I know if the fridge is level?
Place a bubble level on the top edge of the fridge from front-to-back and side-to-side. Adjust feet until the bubble sits centered in both directions.
Use a bubble level on the top and adjust until the bubble is centered in both directions.
Watch Video
Top Takeaways
- Level the fridge accurately
- Use anti-tip hardware when recommended
- Add non-slip mats for friction and safety
- Test stability after each adjustment
- Know when to call a professional