grfn2853af: Urgent Refrigerator Troubleshooting Guide
Learn what grfn2853af means, immediate fixes, diagnostic flow, and step-by-step repair guidance to get your fridge cooling again. Includes safety notes, cost ranges, and prevention tips.

grfn2853af is a fault code indicating a control-board related issue affecting cooling or defrost systems. It typically requires immediate checks of the defrost drain, door seals, and sensor wiring. Start with a safe reset, then progress through the diagnostic flow before escalating to professional help if the code reappears on a reliable modern fridge.
Understanding grfn2853af: What it means for your refrigerator
grfn2853af is a fault code displayed by certain refrigerator models to signal a potential fault in the cooling or defrost system. When this code appears, it typically points to issues in one of a few core areas: the defrost drain and frost buildup, the temperature sensor or thermistor, or the control board that manages defrost cycles and compressor operation. According to How To Refrigerator, these faults often start small—like a blocked defrost drain or a slipping sensor—then escalate if left unaddressed. Recognize that grfn2853af is not a single fixed fault; it’s a catch-all indicator used by many brands to flag abnormal readings from internal sensors or defrost circuitry. For homeowners, this means you should approach the problem methodically: verify basic safety, perform simple resets, inspect the defrost drain for blockages, and ensure door seals are intact. By framing the issue as a sensor, defrost, or control-board fault, you can focus your checks where they matter most and reduce unnecessary part replacements. This approach aligns with the How To Refrigerator methodology for diagnosing common fridge errors with clear, actionable steps.
Quick checks you can perform before deeper diagnosis
- Safety first: unplug the refrigerator or switch off at the wall outlet before touching any internal components.
- Visual reset: wait 60 seconds, then plug back in and observe if the display resets and the compressor starts normally.
- Door seals: inspect gaskets for gaps or cracks; a poor seal forces your fridge to work harder and can trigger temperature-related fault codes.
- Exterior environment: ensure the fridge is not in direct sunlight, not overloading power circuits, and that the condenser coils are clean and unobstructed.
- Defrost drain glance: look behind the back panel or at the evaporator area (if accessible) for frost or a clogged drain tube; a blocked drain is a common source of defrost-related faults that can trigger grfn2853af.
- Sensor indicators: if you have access to the thermistor or temperature sensor wiring, check for loose connections or damaged insulation. While not always visible, poor sensor connections are a frequent culprit.
If the code persists after these quick checks, proceed with the diagnostic flow outlined below and consider scheduling a service call if you notice leaking, pooling water, or abnormal temperatures. The goal is to rule out simple causes before moving to more involved repairs.
Diagnostic flow: symptom → possible causes → solutions
When grfn2853af appears, start with the most likely, least invasive causes and progress to more complex failures. The symptom is a fault indication that the fridge is not maintaining temperature properly or the defrost cycle is malfunctioning. Common causes, ordered by likelihood, include a blocked defrost drain, a faulty temperature sensor, or a glitch in the control board. Less common but plausible issues involve wiring harness damage, compressor problems, or refrigerant-related concerns.
For each identified cause, apply the corresponding fix from the list below. Begin with easy steps (like drain cleaning or seating sensors) and move toward more involved tasks (like component replacement). If you encounter refrigerant issues, a refrigerant charge, or a malfunctioning compressor, note that these are not DIY fixes for safety and legal reasons and require licensed technicians. Throughout the process, document symptoms and test results to aid professionals if you need to call one.
- Defrost drain blockage (high likelihood): Clear the drain, ensure proper drainage, and re-test.
- Sensor/thermistor fault (medium likelihood): Inspect connections, replace if defective, re-test temperatures.
- Control board glitch (low likelihood): Reset or power-cycle, then verify post-reset operation; if it returns, prepare for professional service.
- Wiring harness or compressor issues (low likelihood): Inspect for corrosion, heat damage, or loose connectors; replacements require professional handling.
Step-by-step fix for the most common cause
Step 1: Safety first and prepare tools
Turn off power to the fridge and unplug. Gather a flashlight, container for catching any residual water, a clean cloth, a small brush, a multimeter, and replacement tubing or fittings if you suspect drainage issues. Tip: Work in a well-lit area and avoid touching the cooling coils directly with bare hands.
Step 2: Inspect and clear the defrost drain
Locate the defrost drain tube; if accessible, trace its path to the drain pan. Look for frost buildup or a blockage. Use warm (not boiling) water to flush the drain and a small flexible brush to dislodge any residues. Re-test after a brief warm-up period and listen for proper drainage sound. Pro tip: Avoid using chemicals that could damage rubber tubing.
Step 3: Check the evaporator housing and drain pan
Inspect the evaporator pan for standing water, unusual frost, or leaks. Ensure the pan is correctly positioned and that the drain hole is clear. If you find frost in the evaporator, allow defrost by itself for a short period, or manually assist the defrost cycle if your model supports it. Warning: Excess moisture can short the electronics; dry surfaces thoroughly before reassembly.
Step 4: Test the temperature sensor/thermistor
Access the sensor terminals or the wiring harness to the thermistor. With the fridge powered, gently wiggle connections to confirm resistive contact. If the readings appear inconsistent or out of spec on a multimeter, replace the sensor according to your model’s service manual. Pro tip: Maintain clean, dry contacts and avoid twisting wires that could break the sensor.
Step 5: Reset the control board and restore power
After performing the above steps, reset the control board by unplugging for 60 seconds and then plugging back in. Allow the fridge to reach operating temperature and monitor for the grfn2853af reoccurrence. If the code returns, document the observed symptoms and consider professional diagnostics.
Step 6: Decide on professional service
If the fault persists after a full reset and the defrost drain, sensor, and wiring checks, or if you notice refrigerant smells, ice buildup near the compressor, or unusual noises, contact a certified technician. Cost ranges for professional service can vary, typically starting around $100–$250 for diagnostic calls and potentially higher for component replacements or refrigerant service.
Other possible causes and how to address them
Beyond the defrost drain and sensor, grfn2853af can be triggered by several other issues worth inspecting. A faulty door gasket can keep warm air from entering, causing the compressor to run excessively and triggering fault codes. In some cases, a dirty condenser coil or poorly ventilated cabinet reduces cooling efficiency, prompting the control board to flag a fault. Electrical connections inside the control console can loosen over time, producing intermittent faults that are only resolvable by reseating or replacing connectors.
Address these possibilities with a methodical approach:
- Door gasket: Clean or replace if frayed; test by closing the door on a piece of paper to check seal.
- Condenser: Vacuum loose dust from coils; ensure adequate clearance around the back of the unit for airflow.
- Wiring: Inspect harnesses for corrosion or loose spade connectors; secure and re-test.
- Refrigerant system: If you suspect a leak or pressure issue, stop DIY attempts and call a licensed tech; refrigerant work is hazardous and typically requires certification.
Always verify if the fault code reappears after each addressed item to isolate the underlying cause more precisely. This stepwise approach helps prevent unnecessary replacements and ensures you’re not missing a simpler resolution.
Safety, warnings, and when to call a professional
Safety is non-negotiable when working with refrigerators. Always unplug before inspecting electrical components, and avoid touching live metal parts. If you encounter refrigerant lines, electrical circuits with exposed wiring, or if the unit is warm to the touch while showing fault codes, pause repairs and call a professional.
Cost considerations: Typical diagnostic calls range from $100 to $250, with potential additional charges for part replacements. Replacement sensors or defrost components usually fall in the $20–$120 range per part, plus labor that varies by region. These ranges are estimates; actual costs depend on your model, the extent of the fault, and local rates.
The How To Refrigerator team recommends leaning into a structured diagnostic approach rather than guessing, and seeking professional help when you encounter refrigerant systems, compressor faults, or persistent electrical issues. Quick, safe, and methodical action minimizes damage and downtime.
Prevention: maintenance routines to avoid grfn2853af
Preventive maintenance is your best defense against grfn2853af. Schedule regular checks of door seals, coils, and drainage paths; keep the condenser area clear of dust and obstructions; and avoid frequent door opening during hot or humid days. Regularly run the fridge’s built-in diagnostic tests if available, and replace worn sensors or seals proactively.
- Monthly: Wipe door seals and inspect for uniform contact.
- Quarterly: Clean condenser coils and check drainage path for frost buildup.
- Annually: Have a technician inspect the control board wiring and sensor calibrations for drift.
By maintaining a steady thermal load and reducing frost formation, you’ll reduce the likelihood of sensor or defrost faults triggering grfn2853af.
What to monitor after repair
After performing fixes, monitor for 24–72 hours for temperature stability and absence of moisture or frost in the evaporator. If temperatures remain inconsistent or the error code returns, re-run the diagnostic flow and consider escalation to a professional.
Quick recap: what to do next and how to test the fix
- Power down safely and inspect for obvious defects (drain, seals, connections).
- Clear defrost drain and verify proper drainage.
- Test sensors and control wiring; replace as needed.
- Reset the control board and observe fridge performance.
- If required, involve a professional with a clear report of symptoms and steps taken.
Steps
Estimated time: 45-75 minutes
- 1
Power down and prepare tools
Unplug the fridge, locate the repair area, and assemble a flashlight, container, brush, towels, a multimeter, and any replacement parts. This ensures you work safely and can measure continuity if needed.
Tip: Label wires before disconnecting to aid reassembly. - 2
Inspect defrost drain and evaporator area
Look for frost blocks, ice, or pooling water in the drain or pan. Clear any blockage with warm water and a flexible brush; ensure the drain is open and drains freely.
Tip: Do not use boiling water—it can damage plastics and seals. - 3
Check sensors and wiring
Access the thermistor terminals and inspect for damaged insulation or loose connectors. Re-seat connectors firmly and, if needed, test resistance with a multimeter; replace the sensor if readings are outside spec.
Tip: Handle delicate connectors with care to avoid further damage. - 4
Reset the control board
With power reconnected, perform a full reset by unplugging for 60 seconds, then plugging back in. Allow the system to stabilize for several hours and monitor temperature readings.
Tip: Some models require a specific pin sequence to reset; consult your manual if available. - 5
Test operation and observe
Run a short cycle, monitor temperatures in the fresh food and freezer compartments, and verify no error codes recur. If the system remains stable, you’ve likely resolved the issue.
Tip: Record temperatures at 15-minute intervals for 2 hours. - 6
Call a professional if unresolved
If grfn2853af returns after steps, or you notice leaks, abnormal noises, or refrigerant concerns, contact a licensed technician. Provide a summary of steps taken and any sensor or drain findings to speed up service.
Tip: Ask for a written estimate before any replacement parts or labor.
Diagnosis: Error code grfn2853af appears on display, fridge not cooling adequately
Possible Causes
- highDefrost drain blockage or frost buildup
- mediumThermistor/sensor fault or loose wiring
- lowControl board glitch or firmware anomaly
Fixes
- easyClean/re-route defrost drain and inspect drain pan
- mediumTest and replace faulty thermistor or sensor wiring
- easyPower-cycle/reset control board; update firmware if available
- hardReplace control board or call a professional for diagnostics
FAQ
What does grfn2853af indicate on my fridge?
grfn2853af signals a fault related to cooling or defrost functions, typically involving sensors, drainage, or the control board. It’s a general error code used by multiple brands to flag abnormal readings that require inspection and potentially component replacement.
grfn2853af flags a sensor, drain, or control-board fault affecting cooling. Start with simple resets and drainage checks, then proceed with a structured diagnostic flow.
Can I fix grfn2853af myself?
Yes, many homeowners can perform initial checks like reset, drain clearing, and sensor reseating. However, avoid refrigerant work and complex board replacements; those require a licensed technician. If the fault persists after basic steps, call a professional.
Yes, you can start with resets, drain cleaning, and sensor checks. For persistent issues or refrigerant concerns, contact a professional.
What are typical costs to repair grfn2853af?
Costs vary by cause and region. DIY fixes usually cost under $50 for parts like a sensor or drain kit, while professional diagnostics start around $100–$250, plus part costs if needed.
DIY parts are often under $50; professional diagnostics start around $100 to $250, with parts adding if needed.
When should I call a professional?
Call a professional if you suspect a refrigerant leak, a failed compressor, or persistent fault codes after all basic steps have been taken. Also seek help if safety risks or electrical issues are evident.
Call a professional if there’s a refrigerant issue, a failed compressor, or the fault code keeps coming back after basic steps.
Will resetting the fridge fix grfn2853af?
Resetting can clear transient glitches and help verify if the fault was temporary. If the code reappears, you’ll need to continue diagnostics to identify the underlying cause.
Resetting can clear glitches, but if the code returns, you’ll need to continue diagnosing the root cause.
Is grfn2853af related to energy efficiency?
Fault codes often indicate conditions causing the fridge to work harder, which can reduce efficiency. After repair, monitor energy use to ensure normal operation returns.
Fault codes can mean the fridge is working harder, which affects efficiency. After repair, watch energy use to confirm normal operation.
Watch Video
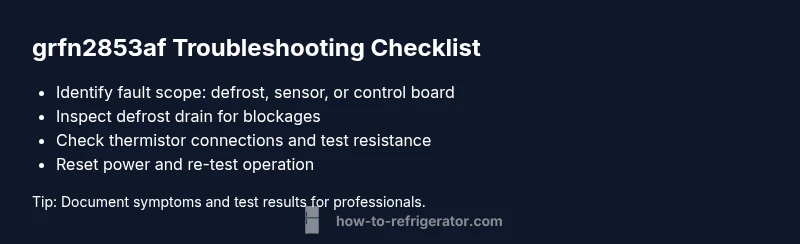
Top Takeaways
- Identify grfn2853af as a sensor/defrost/control fault indicator.
- Start with safe resets and drain/sensor checks before expensive parts.
- Follow a structured diagnostic flow to isolate the root cause.
- If unresolved, involve a licensed technician and reference symptoms collected.
- Prevent recurrence with regular maintenance and clean drainage paths.