b36cl80ens Error Code: Urgent Fridge Repair Guide
Urgent guide to diagnosing and fixing the b36cl80ens fridge error code with practical steps, checks, and safe repair tips from How To Refrigerator.

The b36cl80ens error code signals a sensor or control fault affecting temperature regulation. Quick fixes start with a safe reset, door-seal checks, and condenser cleaning. If the code persists, follow our diagnostics before calling service. How To Refrigerator provides practical, urgent guidance. This guide is designed for homeowners who need fast, safe steps to regain cooling.
What b36cl80ens Means and Why It Appears
The b36cl80ens code is a generic refrigerator fault indicating a sensor or control pathway issue rather than a simple door left open. According to How To Refrigerator, this kind of fault typically involves the temperature sensor (thermistor), the control board, or related wiring. When the fault is detected, the compressor may run erratically or the display may flash. It is not unsafe in itself, but ignoring it can lead to inconsistent cooling, spoiled food, and increased energy use. Homeowners should approach this calmly, using a methodical diagnostic flow rather than random fixes. The key is to isolate whether the issue is mechanical, electrical, or a simple calibration mismatch. In many households, the root cause is a sensor that has drifted out of spec or a connection that has become loose due to vibration or resonance from the compressor. The How To Refrigerator team emphasizes early testing and safe power-down steps to prevent further damage and to protect you and your family. While this article uses the keyword b36cl80ens throughout, remember this code is a fault indicator rather than a fixed component name, so the repair path depends on the underlying cause.
Quick Safety and Prep Checks
Before touching any wiring, unplug the fridge and wait at least 60 seconds to discharge capacitors. Have a flashlight handy and keep a small tray for screws and fasteners. Use insulated gloves if you’re comfortable handling electrical components, but never work with the unit powered on. Clear the area around the fridge so you can access the rear panel or bottom kick plate. If your model has an ice maker or water dispenser, shut off the water supply to avoid any leaks. The goal of this phase is to create a safe workspace and to verify that common, easy fixes have no effect on the error code. Once you confirm safety, proceed with the diagnostic steps in a logical order.
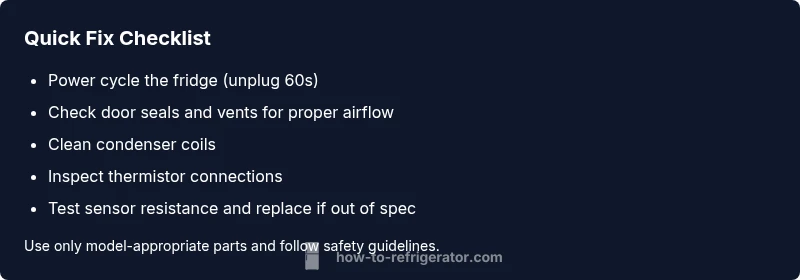
Immediate Quick Fixes You Can Try
- Power cycle the refrigerator: unplug for 60 seconds, then plug back in and reset the display. This simple reset resolves many transient sensor glitches.
- Inspect door seals and airflow: a poor seal or blocked vents can cause temperatures to drift and trigger errors. Clean gaskets and ensure doors close firmly.
- Clean condenser coils and confirm level stance: dirty coils and an unlevel fridge can create cooling inconsistencies that mimic sensor faults. Wipe coils gently with a brush or vacuum designed for electronics.
How to Approach Diagnostic Testing (Non-Destructive First)
Start with the least invasive tests to preserve warranty and avoid unnecessary parts replacement. Check the thermistor connection at the control board for corrosion or loose pins. If you have model-specific access to a service manual, verify that the thermistor resistance at room temperature aligns with the spec sheet. Many families notice an abnormal sensor value after a power surge or a rodent investigation around the back of the unit. If the readings look off, you can attempt a sensor recalibration or a gentle replacement using the correct part number for your model. Document all readings as you go so you can share data with a professional if you need to escalate. Your goal is to establish whether the sensor, wiring, or control board is out of tolerance while maintaining food safety.
Most Common Causes in Order of Likelihood
- High likelihood: Faulty thermistor or temperature sensor drift (sensor calibration failure). This is the most common reason a b36cl80ens error code appears, often caused by age, exposure to moisture, or small temperature fluctuations.
- Medium likelihood: Control board glitch or firmware hiccup. Modern fridges rely on microcontrollers; a firmware reset or minor glitch can trigger an error.
- Low likelihood: Loose, corroded, or damaged wiring harness between sensor, board, and compressor. Visual inspection is essential to catch minor damage, but testing with a multimeter may be needed to verify continuity.
Step-By-Step Repair for the Leading Cause (Thermistor)
- Disconnect power and gain access to the sensor: remove the rear panel or bottom cover according to your model’s manual. 2) Inspect the thermistor’s connector and wires for signs of wear or corrosion; unplug carefully. 3) Test resistance with a multimeter at room temperature and compare with the spec range in your manual. 4) If out of range, replace the thermistor with the exact part number for your model. 5) Reconnect all wiring securely, seal the panel, and power the unit back on. 6) Monitor the display for proper temperature readings over several hours. The goal is to restore stable control without triggering the code again. Costs vary by model and part availability and can range from roughly $20 to $150 for the thermistor, plus potential labor if you hire a technician.
Other Causes and How to Handle Them
If thermistor replacement doesn’t resolve the issue, check the control board firmware and look for any error codes that may indicate a faulty processor. A software reset or firmware update can sometimes fix glitches. Inspect the wiring harness for loose connectors, pin corrosion, or damaged insulation. If you observe burnt smells, melted insulation, or visible damage, discontinue use and schedule service. Some models may require a professional diagnosis and replacement of the control board or sensor assembly, which can range from $120 to $600 depending on the model and whether a service visit is needed.
Safety, Warnings, and When to Call a Pro
Electrical work on a refrigerator carries risk if you’re not comfortable with disassembly or testing live circuits. Always unplug the unit before touching internal components and never test with the power on. If you hear buzzing, see arcing, or smell burning insulation, evacuate and contact a licensed technician immediately. If you’re uncertain about readings or part compatibility, it’s safer to call a pro. The cost for professional repair can range from $100 to $350 for simple sensor or control board fixes, and up to $600 or more for major component replacements. Considering the potential for food waste and food safety, a timely professional diagnosis is often the most economical choice for a persistent b36cl80ens fault.
Prevention Tips to Avoid This Error in the Future
- Schedule regular maintenance to clean coils, inspect seals, and verify airflow.
- Keep the fridge away from heat sources and ensure adequate clearance behind the unit.
- Use a surge protector and avoid frequent power cycles that stress sensors and boards.
- Record any abnormal temperature readings and address early warning signs before they escalate. Regular checks can reduce recurrence and extend the life of sensor components.
Steps
Estimated time: 1-2 hours
- 1
Power cycle the fridge
Unplug the unit for 60 seconds, then plug back in and observe the display. This can clear transient faults and reset sensors. If the code returns, proceed to the next steps.
Tip: Label the plug and ensure the power outlet is not controlled by a switch. - 2
Access and inspect the sensor wiring
Remove the rear panel or bottom cover per the model’s manual. Visually inspect the thermistor wires and connectors for corrosion, wear, or loose pins. Disconnect gently and reconnect firmly.
Tip: Take a photo of the connector orientation before unplugging to avoid miswiring. - 3
Test the thermistor resistance
With the fridge unplugged, use a multimeter to check the thermistor resistance at room temperature and compare to the specification in your manual. Resistance out of range indicates replacement is needed.
Tip: If you’re unsure how to test, consult the service manual or a professional for safe testing. - 4
Replace sensor or thermistor if needed
Install the exact replacement part for your model. Reconnect wiring and secure the panel. Power the unit and confirm that the temperature readings stabilize.
Tip: Only use OEM or model-appropriate parts to prevent compatibility issues. - 5
Monitor performance after repair
Allow the fridge several hours to reach stable temperatures and verify the error code no longer appears. Record temperatures in the fresh-food and freezer compartments.
Tip: Keep doors closed during stabilization to avoid additional temperature swings. - 6
Decide on professional help if unresolved
If the code reappears after sensor replacement, the problem may lie with the control board or harness. A qualified technician should diagnose and replace the appropriate component.
Tip: Request a diagnostic quote before any major repairs to avoid surprise costs.
Diagnosis: Fridge displays b36cl80ens and temperature control is erratic
Possible Causes
- highFaulty thermistor or sensor drift
- mediumControl board glitch or firmware hiccup
- lowLoose or damaged sensor wiring harness
Fixes
- easyPower cycle the unit and reset the display
- easyInspect sensor connections and replace thermistor if out of spec
- hardUpdate firmware or replace control board (professional required)
FAQ
What does the b36cl80ens error code mean on my refrigerator?
b36cl80ens usually points to a sensor or control issue affecting temperature regulation. It’s not a single part but a fault signal to test sensors, wiring, and the control board. Start with safe resets and basic sensor checks before replacing components.
The b36cl80ens code signals a sensor or control issue that you should diagnose starting with a safe reset and sensor checks.
Can I fix b36cl80ens myself?
Yes, many homeowners can perform initial diagnostics and sensor checks. Begin with power cycling, wiring inspection, and thermistor testing. If the code persists or you’re unsure about testing electrical components, contact a licensed technician.
You can try basic diagnostics, but if you’re unsure about electrical parts, call a professional.
How long does a repair take?
A simple sensor replacement and reset can take 1-2 hours. More complex fixes, like a control-board replacement, may require 2-4 hours plus parts availability and potential service call time.
Most fixes take a couple of hours, but complex board repairs can take longer.
Will fixing b36cl80ens void my warranty?
Repair impact on warranty depends on warranty terms and whether DIY work was performed. If a service professional handles it, warranties are typically preserved. Always check your model’s warranty conditions before opening the unit.
Warranty rules vary, but professional service usually preserves it.
What is the typical cost range to fix this error?
Parts like a thermistor cost roughly $20-$150 depending on model; a control-board replacement can range from $120-$600. Labor adds $60-$150 for a typical diagnostic if you hire a technician.
Expect part costs from about $20 to $600, plus labor if you hire a technician.
Watch Video
Top Takeaways
- Identify whether the sensor or board is at fault to avoid unnecessary parts replacement.
- Start with safe resets and simple sensor checks before complex repairs.
- Document readings and preserve parts for accurate professional diagnosis.
- Repair costs vary; expect ranges for parts and labor depending on model.
- Consider professional help if the fault persists after sensor replacement.