How to Use Refrigerator Deodorizer: A Homeowner's Guide
Learn how to use a refrigerator deodorizer to remove fridge odors safely. This guide covers deodorizer types, placement, replacement schedules, safety tips, and a practical step-by-step process for a consistently fresh fridge.

Using a refrigerator deodorizer correctly neutralizes odors without masking them with strong scents. This guide helps you choose the right type, place it effectively, and refresh on a schedule. You’ll learn about charcoal, gels, and powders, plus safety tips. By following these steps for how to use refrigerator deodorizer, you’ll restore a neutral, clean scent inside your fridge.
Why a Refrigerator Deodorizer Matters
Odors in the fridge often originate from milk, onions, garlic, citrus peels, and yesterday’s leftovers. Even when food looks fresh, pungent aromas can transfer to produce and sauces, making groceries seem less appealing. While baking soda offers some relief, a purpose-built refrigerator deodorizer targets odor molecules more efficiently and with less risk of cross-scenting other foods. If you’re exploring how to use refrigerator deodorizer effectively, you’ll want a product matched to your fridge size, a smart placement plan, and a predictable refresh schedule.
According to How To Refrigerator, using a dedicated deodorizer yields more consistent odor control than improvised remedies. The How To Refrigerator team found that materials like activated charcoal, silica gel, or specially formulated odor-absorbing gels capture odor molecules rather than simply masking them with fragrance. This means your fridge interior stays neutral and food flavors remain true. When selecting a product, look for food-contact safe labeling and a clear expiration/renewal guidance from the manufacturer.
In most homes, the best approach blends a deodorizer with regular cleaning and organization. Keep the deodorizer away from open foods, and ensure you replace or refresh it according to the product’s instructions. With the right setup, you’ll enjoy a consistently fresh fridge that preserves the taste of groceries and reduces the chance of lingering spoilage odors.
Types of Refrigerator Deodorizers
There are several styles of deodorizer products designed for refrigerators, each with its own strengths and caveats. Activated charcoal bags are popular for their absorptive power and long-lasting performance, but they can be bulkier and may require occasional shaking or re-sealing to maintain effectiveness. Gel-based deodorizers offer a quick, neat option with a noticeable scent, yet they should be placed away from direct contact with fruits and vegetables. Solid discs or wafers provide a low-profile approach that can sit on shelves or in corners without spilling. Some newer formulations combine odor-absorbing materials with a light, food-safe scent to give you a fresher baseline without overpowering your foods.
When choosing, consider your fridge size, typical odor sources, and how you prefer the deodorizer to be refilled or replaced. For households that want minimal maintenance, a compact charcoal bag or a pre-filled gel container that clicks into place near the back wall tends to offer a reliable balance of effectiveness and convenience. Always verify that the deodorizer is labeled as safe for contact with food storage areas and that it’s designed to stay within the refrigerator environment rather than in the freezer or pantry.
Different models also vary in how long they last. Some products advertise weeks of use, while others are designed for months. In practice, a well-chosen option paired with a clear replacement schedule will yield the best results. The goal is a neutral air baseline rather than a noticeable fragrance, so opt for odor-absorbing materials rather than strong scents that can compete with your food.
In sum, the right deodorizer for your fridge should align with your space, maintenance preference, and whether you want a discrete or slightly scented solution. Before you buy, read product labels carefully, check whether the material is non-toxic for food areas, and confirm compatibility with your fridge’s internal temperature range.
How to Choose the Right Deodorizer for Your Fridge Size
Fridge size and layout play a crucial role in how effectively a deodorizer performs. A compact apartment fridge can often maximize odor control with a small activated charcoal pouch or a gel canister placed on a shelf away from crisper drawers. A full-size side-by-side or French-door fridge may benefit from a larger, longer-lasting option that sits near the back wall but away from vents so it does not impede airflow. When evaluating options, look for products with clear usage instructions and indicators for replacement timing. If your fridge has a dedicated dairy or produce zone, test placement to avoid interference with airflow or direct contact with produce.
Another consideration is how you plan to refresh the deodorizer. Some options are designed for easy top-ups, while others require full replacement. For households that rotate leftovers frequently, a fast-refresh option that is simple to swap out will minimize downtime and ensure continuous odor control. If you’re unsure, start with a smaller product and observe how it performs over two to four weeks, then upgrade to a larger unit if needed.
From a maintenance perspective, regular replacement is more effective than leaving an exhausted deodorizer in place. In many households, the best practice is to track the timing from the day you first notice a measurable odor reduction and adjust based on the label’s guidance and your own senses. When you’re learning how to use refrigerator deodorizer, keeping a simple log helps you optimize scent control without over- or under-using products.
Placement and Usage Best Practices
Placement matters almost as much as the deodorizer itself. The deodorizer should sit in a cool, dry corner away from direct contact with food, moisture, or condensation. If your deodorizer uses a gel or liquid, ensure it is secured in a tray or sealed pouch to prevent spills in the event of a tilt or door bounce. For charcoal-based products, a perforated pouch or breathable pouch helps maximize airflow while reducing the risk of leaks. In general, never place a deodorizer directly on top of food items; keep it in a side shelf, back corner, or inside a dedicated organizer that keeps air circulating and odor molecules moving toward the absorber.
When you install a new deodorizer, avoid leaving it in a position where it can be knocked over by stacked containers, especially on cramped shelves. If you have a freezer zone adjacent to your fridge, do not relocate a deodorizer there unless the label explicitly says it’s safe for subfreezing temperatures. Always verify that the product is rated for refrigerator use and that it does not risk leaking or attracting moisture that could impact food quality. After placement, monitor for any changes in odor and adjust position if deodorizer performance seems uneven across shelves.
Finally, always follow the product’s safety instructions. Some deodorizers require handling with gloves or avoiding aerosol exposure to the eyes. If you have young children or pets, keep the deodorizer out of reach and use a locking shelf or container to reduce accessibility. When in doubt, start with a smaller, easily replaceable option and scale up as you observe effectiveness.
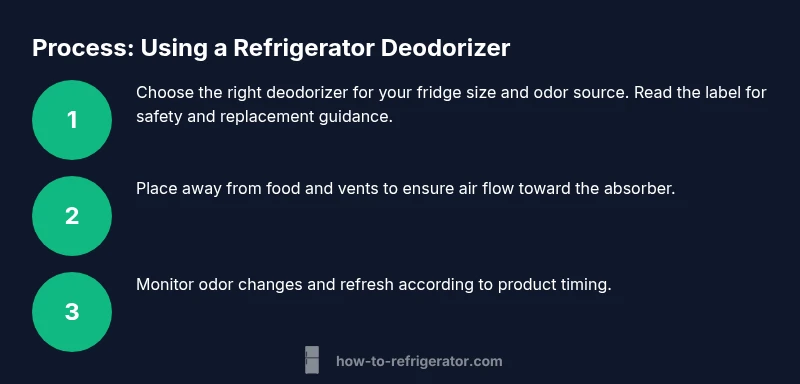
How to Use Refrigerator Deodorizer in Practice (Overview)
Putting knowledge into practice means translating type, placement, and replacement schedules into a simple routine. Start by removing nearby contents and wiping the area to ensure the surface is dry. Next, select a deodorizer according to fridge size and odor sources. Place the unit in a sheltered corner away from vents and direct food contact. Set a reminder for inspection and replacement based on the product’s stated duration, and keep a short log of odor changes to guide future adjustments. Over a few weeks, you’ll identify the best placement and cadence for your specific kitchen setup. This approach aligns with the broader guidance we’ve discussed on how to use refrigerator deodorizer and helps you maintain a consistently neutral fridge environment.
Maintenance, Replacement, and Troubleshooting
A key part of successful odor control is knowing when to refresh a deodorizer. Most products include a recommended replacement interval; adhering to that schedule is essential for maintaining effectiveness. If you notice odors returning, check for moisture buildup or contamination near the deodorizer, which can hinder performance. In some cases, repositioning the unit or choosing a larger size resolves the issue. Always replace damaged or leaking units immediately and dispose of them according to the label’s instructions. If a deodorizer stops working after a short period, try cleaning the surrounding shelves and ensuring there are no food items directly blocking airflow near the deodorizer.
From a maintenance perspective, pairing the deodorizer with regular fridge cleaning—wiping shelves with mild soap and water and removing spoiled items—helps sustain odor control. If you decide to try a different product, allow a short acclimation period before assessing results. By following these guidelines, you’ll sustain a neutral air environment inside the refrigerator and protect the flavor and freshness of stored foods.
Tools & Materials
- Refrigerator deodorizer product (gel, charcoal, or powder)(Choose type based on fridge size and replacement preference. Ensure it is labeled safe for food-contact environments.)
- Mild soap or gentle spray cleaner(For wiping interior surfaces before placement.)
- Soft cloth or paper towels(For cleaning and drying surfaces after wiping.)
- Disposable gloves(Protect hands when handling damp or aromatic products.)
- Small tray or breathable pouch (if the deodorizer isn’t self-contained)(Helps contain liquids and prevents spills.)
- Timer or reminder app(Use to track replacement intervals (e.g., every replacement cycle).)
- Trash bag(For disposing of old or spent deodorizer units.)
Steps
Estimated time: 30-45 minutes
- 1
Gather supplies and prep area
Collect your deodorizer, cleaning supplies, and a clean cloth. Clear a small workspace in front of the fridge and ensure the interior is accessible. This makes the rest of the process smoother and reduces the chance of accidentally spilling contents during handling.
Tip: Wear gloves if you’re using a powder or scented gel; it helps prevent skin irritation and keeps hands clean. - 2
Remove nearby items and inspect shelves
Take out items near where you’ll place the deodorizer. Inspect shelves for spills or spoiled food and wipe down those areas with a mild cleaner. Let surfaces dry completely before proceeding to avoid diluting the deodorizer or creating moisture pockets.
Tip: Keep foods sealed in containers to avoid contamination from any accidental deodorizer exposure. - 3
Prepare the deodorizer
If you’re using a gel or sealed pouch, uncap or open according to the product instructions. For charcoal or loose materials, place them in a tray or breathable pouch. Confirm there are no leaks and that the unit is sealed if required by design.
Tip: Avoid direct contact between porous deodorizer materials and fruits or vegetables unless the product is clearly rated for such contact. - 4
Place the deodorizer away from foods
Position the deodorizer in a back corner or on a shelf away from direct contact with any food items, especially dairy or produce. Ensure it isn’t covering vents or blocking airflow. The goal is to let air move naturally toward the absorber without pooling moisture.
Tip: If you have a slim fridge, choose a compact option that sits near the back wall to preserve shelf space. - 5
Set a test period and monitor
Close the fridge and monitor for 24–72 hours, noting any odor changes. If odors persist, consider adjusting the placement or trying a larger unit. Keep a simple log of what you observe to build a personalized replacement cadence.
Tip: Use a reminder to check the unit after the stated duration on the product label. - 6
Refresh or replace as needed
After the recommended interval, replace or refresh the deodorizer as directed. Wipe any residue, return items, and resume normal use. Consistent refresh cycles help maintain a neutral fridge environment.
Tip: Mark your calendar for the replacement date to avoid forgetting and letting odor control lapse.
FAQ
What type of deodorizer is best for a small fridge?
For small fridges, consider a compact activated charcoal pouch or a small gel canister. They fit on shelves without crowding space and typically require less frequent replacement. Always verify that the product is safe for food-contact areas.
For small fridges, start with a compact charcoal pouch or small gel can. It fits on shelves and is easy to replace.
Is it safe to eat food while using a deodorizer?
Yes, as long as you keep the deodorizer away from open foods and ensure it is in a secure container or tray. Follow the product’s safety label, and never place items directly on top of or inside the deodorizer.
Yes—just keep the deodorizer away from food and in a sealed tray. Don’t place food directly on it.
How long does a deodorizer last?
Replacement intervals vary by product type and usage. Check the label for guidance and monitor your fridge odors over time to decide when a longer-lasting option is needed.
Replacement times vary by product—check the label and monitor odor changes to know when to replace.
Can I use baking soda as a deodorizer?
Baking soda can absorb odors, but it’s slower and less predictable than purpose-built deodorizers. It requires regular replacement and may be messy if spilled. For best results, use a dedicated product designed for refrigerators.
Baking soda works, but dedicated deodorizers work more reliably and are cleaner to use.
What should I do if the deodorizer leaks?
Remove the deodorizer immediately, clean the area with mild soap and water, and dispose of the unit per the label. Ventilate the fridge to avoid lingering moisture and odors.
If it leaks, remove it, clean the area, and replace it after disposal per the label.
Can I use a deodorizer in the freezer?
Not all deodorizers are rated for freezer temperatures. Check the product label to see if it’s safe for subfreezing temperatures before placing it in a freezer compartment.
Only use in the freezer if the label says it’s safe for subzero temps.
Watch Video
Top Takeaways
- Choose the deodorizer type that fits your fridge size and tolerance for maintenance.
- Place the deodorizer away from direct food contact and vents to maximize effectiveness.
- Refresh or replace on a regular schedule to maintain odor control.
- Combine deodorizer use with routine fridge cleaning for best results.